How to register and collect your skin sample
Please read all the instructions before collecting a skin sample.
Important note: Kits must be registered, and collection information must be added online before returning the sample.
Before you start
Only use this collection kit if your face has been unwashed for at least 12 hours.
Contents of your collection kit:
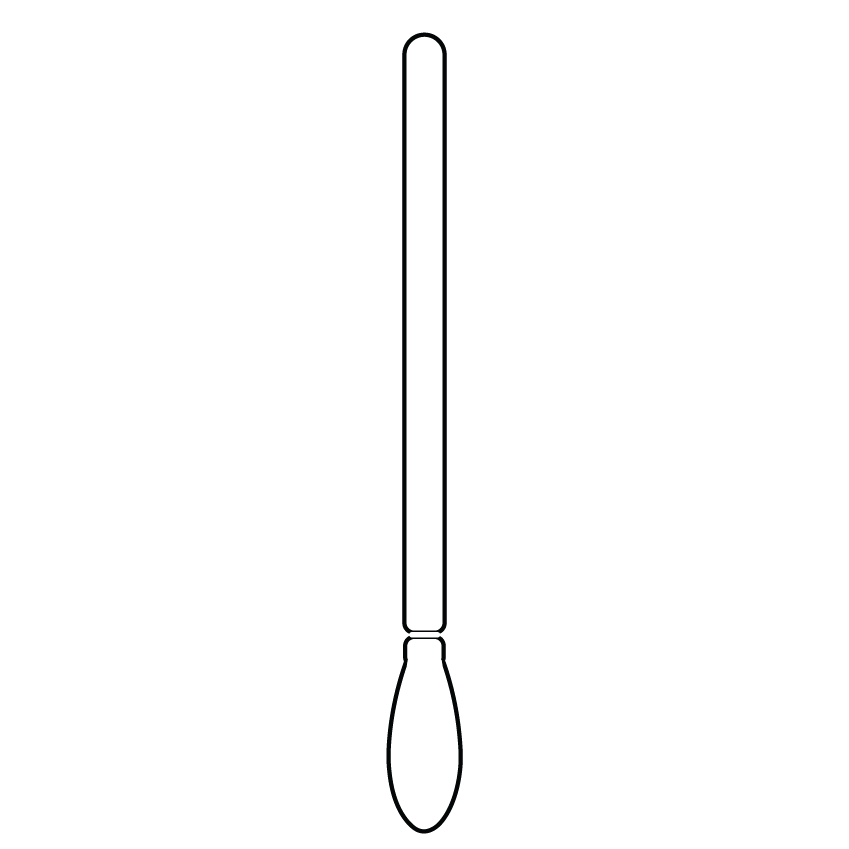
Sampling swab
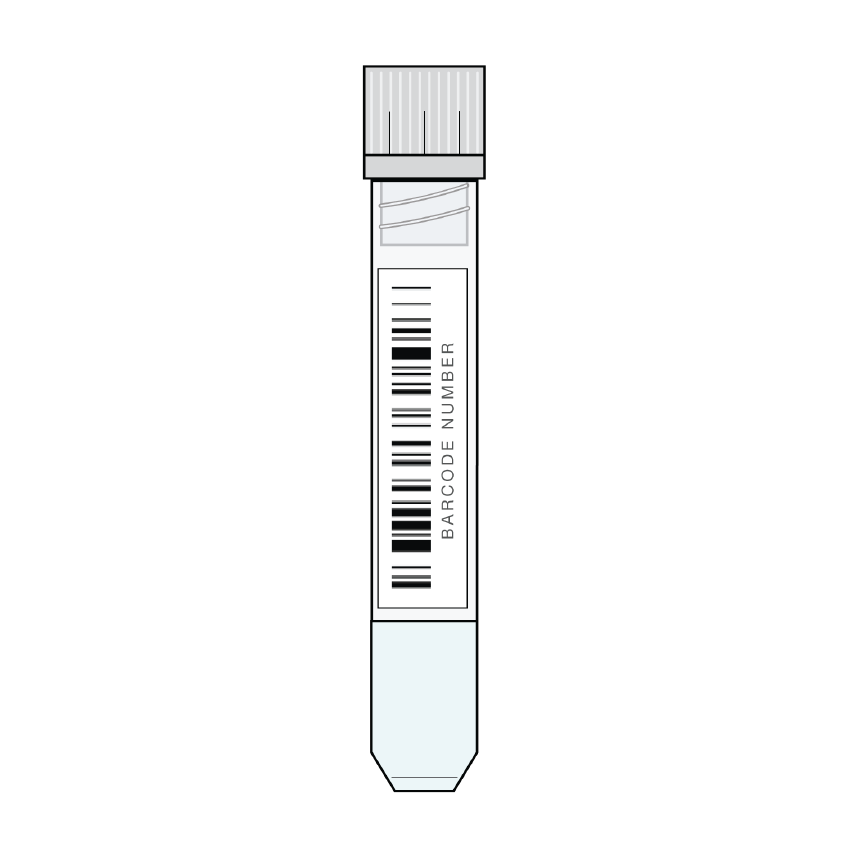
Collection tube
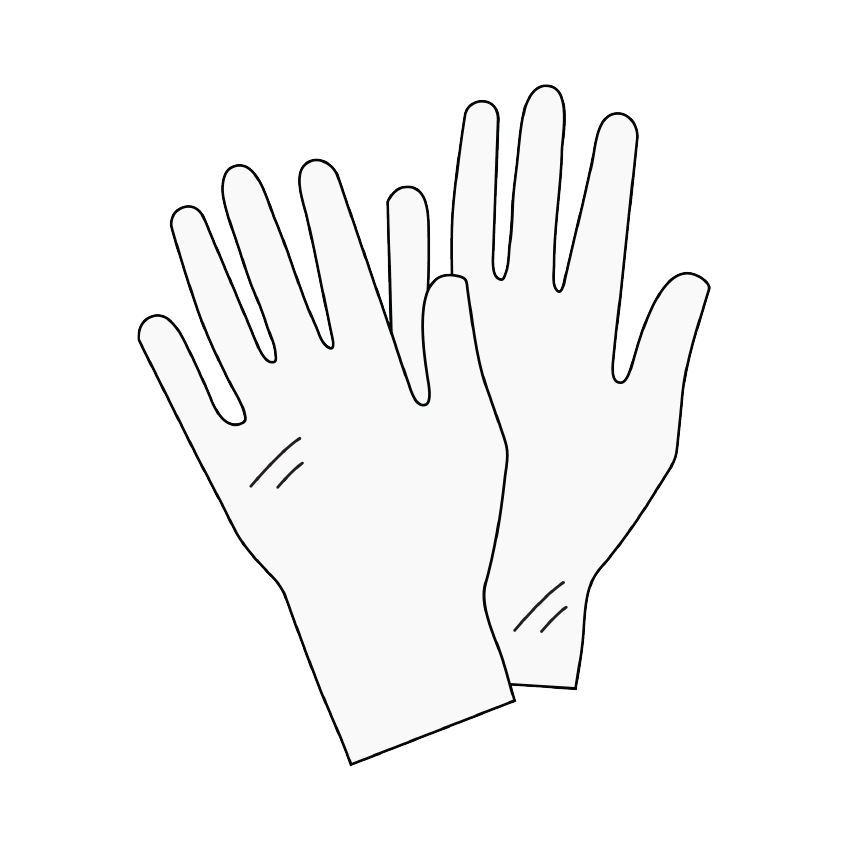
Gloves
Swab template
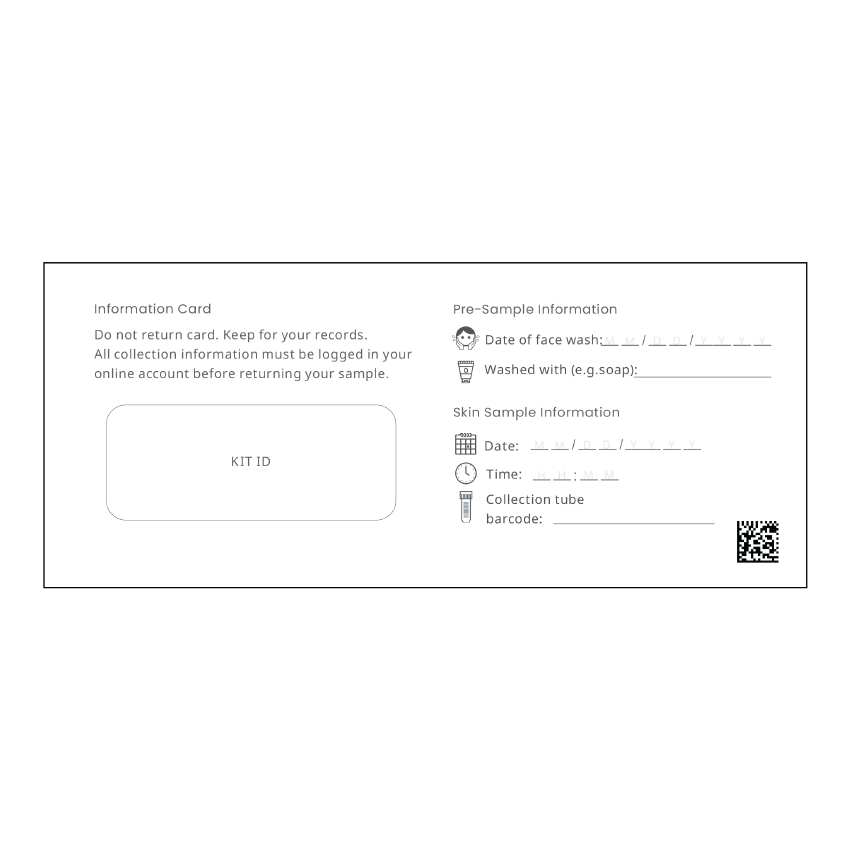
Information card – Kit ID
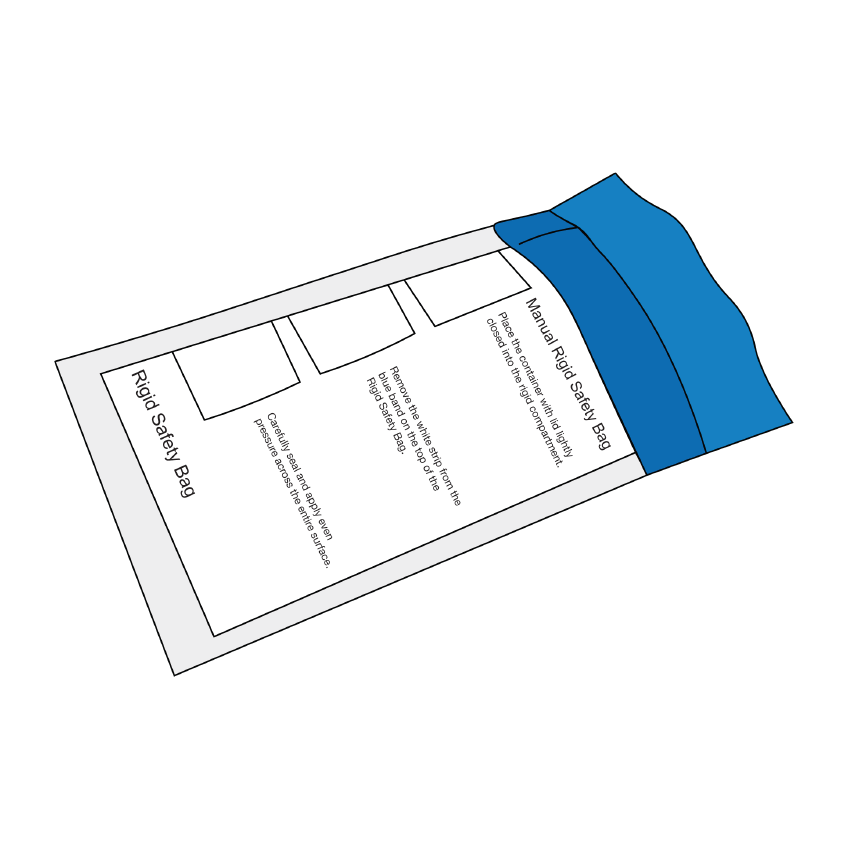
Safety bag
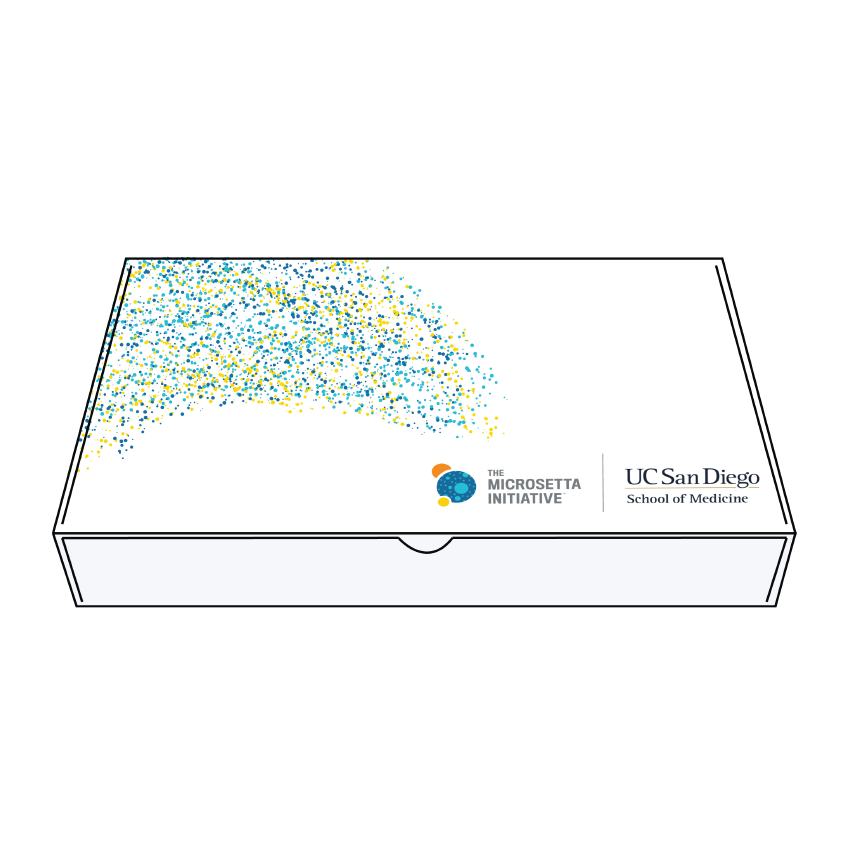
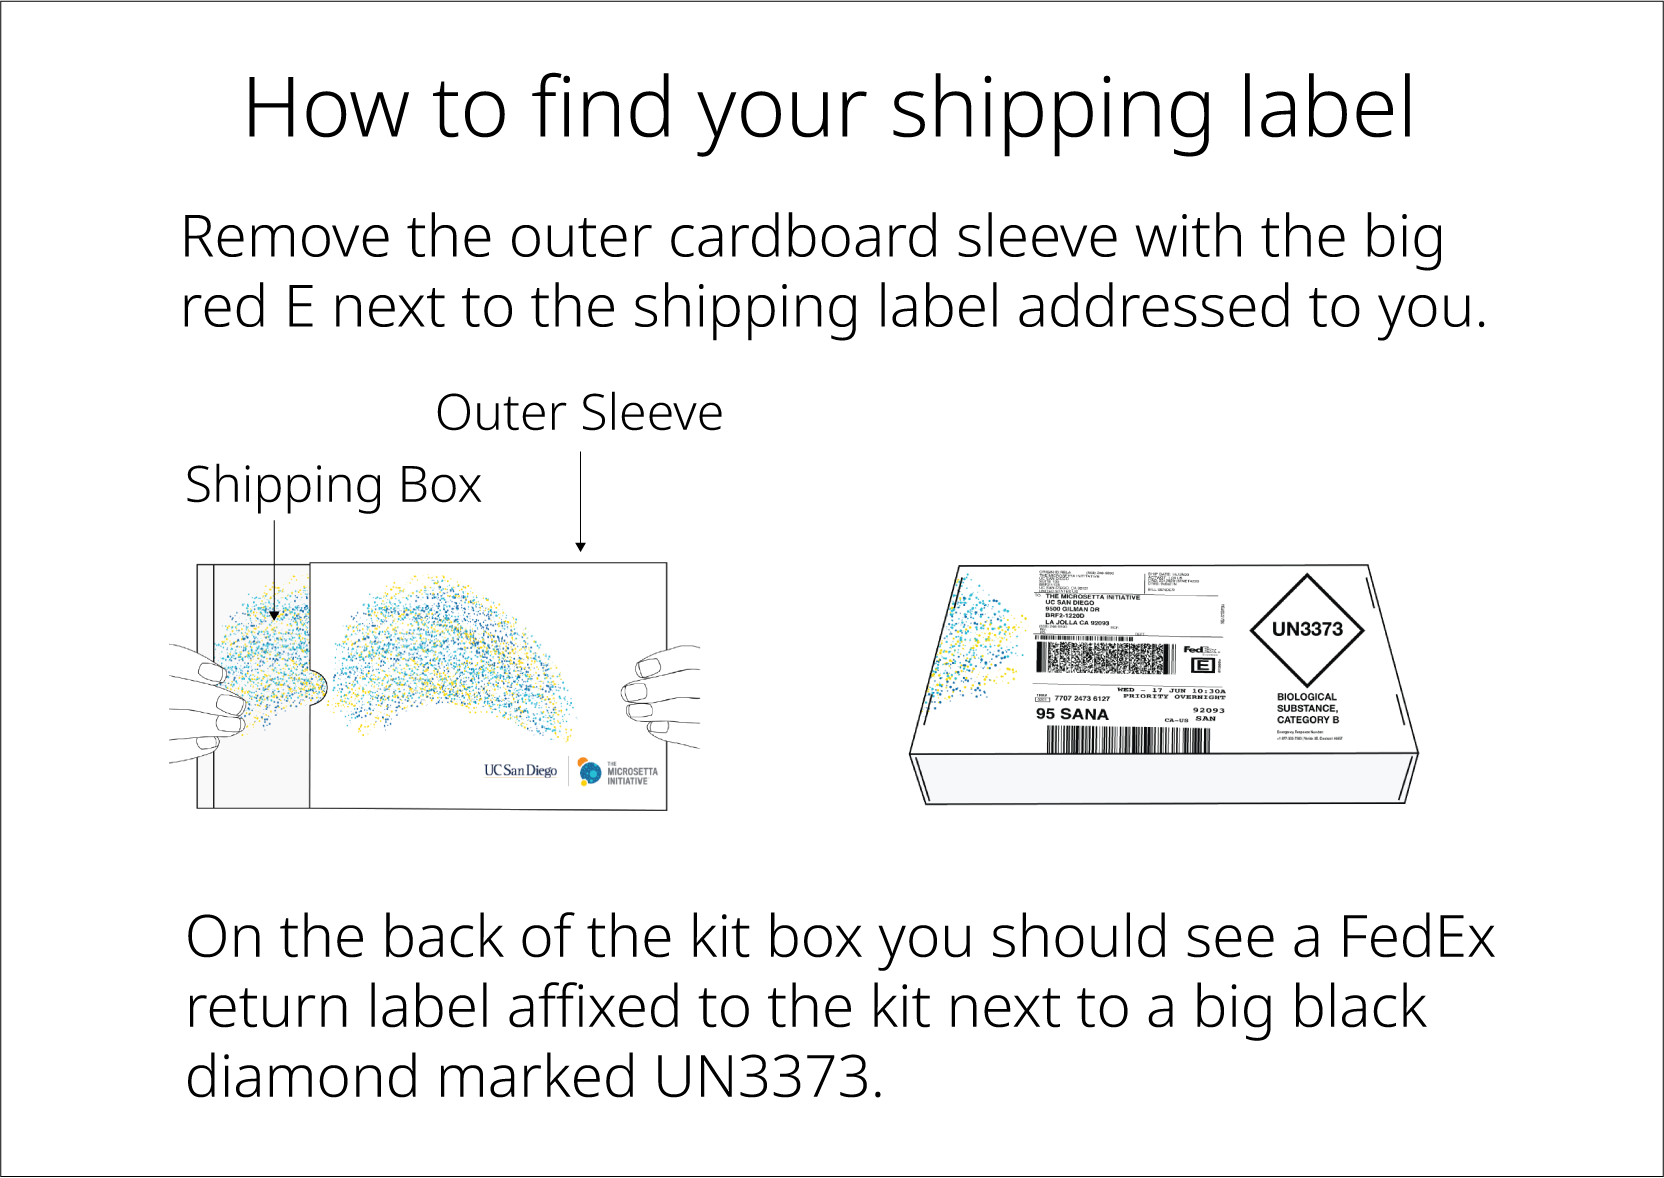
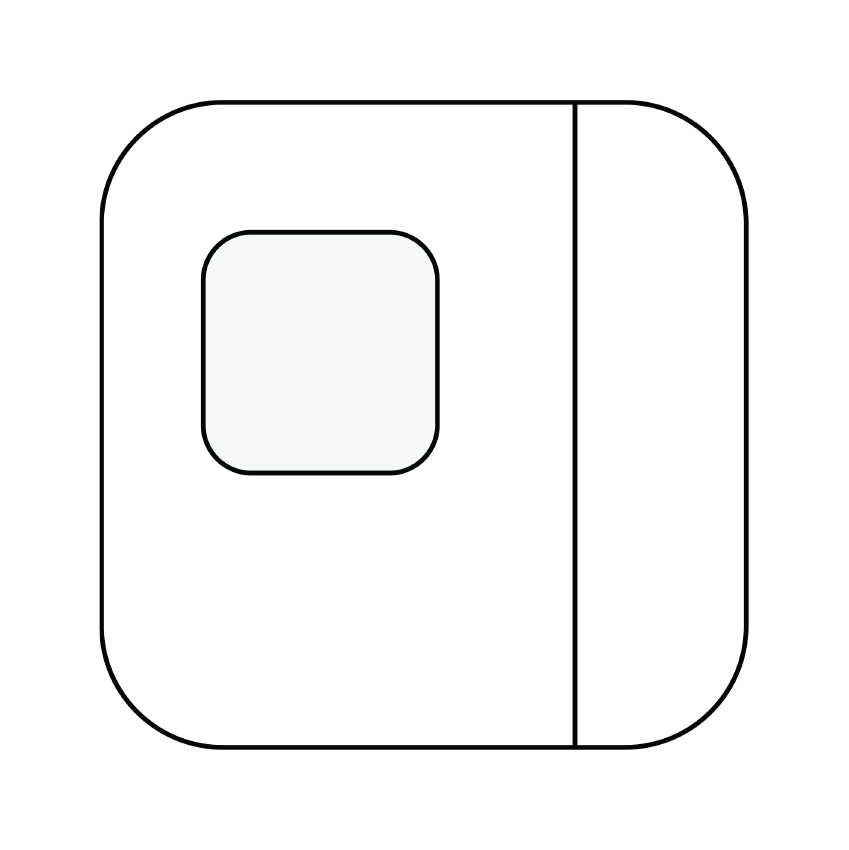
Shipping box – front

Outer sleeve

Return shipping label
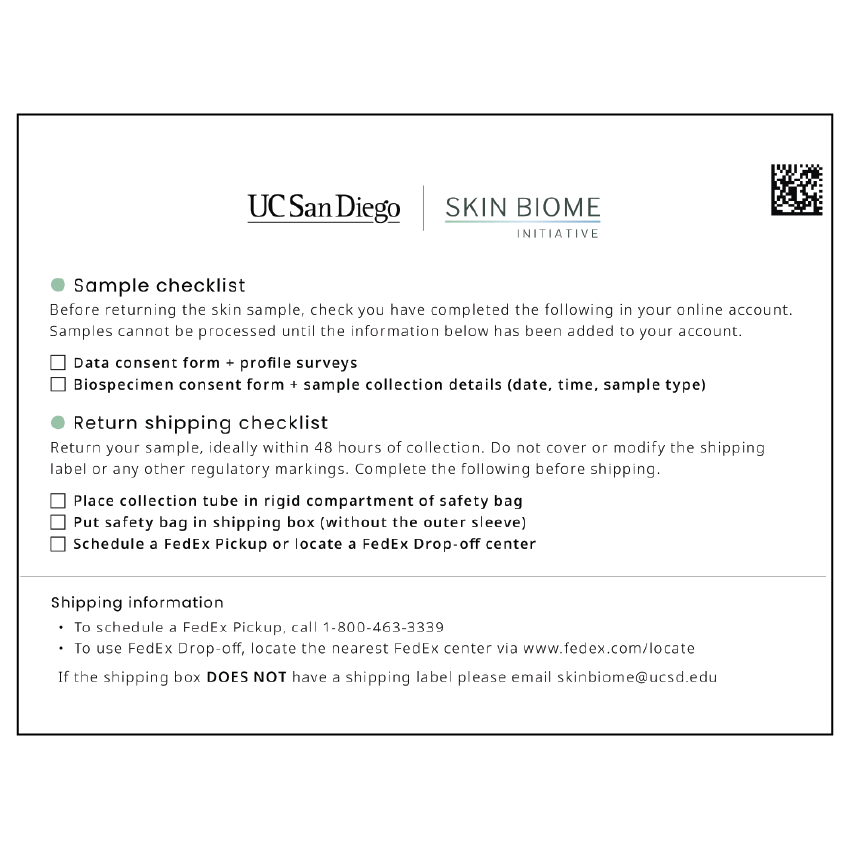
Checklist
Steps | Quick links
Step 1 | Online profile
Each participant needs one profile to track samples.
Note: Multiple samples, including different sample types (e.g., gut or skin), can be added under a single profile.
Visit microsetta-rest.ucsd.edu
1) Sign Up or Log In
- If you’re new, sign up to create an account. The email you use will be associated with your account and used for notifications about profiles and samples.
- If you already have an account, log in.
2. Set up or update your profile
- New participants: Select ‘Add Human Profile’, choose your age range, complete the consent form, and fill in your details.
- Existing participants: Review and update your profile if needed.
3. Completing your profile
- To qualify for this research study, participants must complete their profile in full.
- Use the progress bar to track your progress — surveys are considered complete when the bar turns green.
Step 2 | Register kit
Registering your kit is essential to process and track your sample.
- Visit the ‘My Kits’ page in your account.
- Enter the Kit ID from your information card.
- Select the Barcode ID and click ‘Confirm’.
- Ensure the ID matches the one on your collection tube.
Tip: Don’t forget to register your kit as soon as you set up your profile. You can always return later to complete the surveys.
Step 3 | Prepare
1. Night before sampling
DO: Wash your face. If using a cleanser, choose a non-medicated one.
DO NOT: After washing, do not apply any skincare or beauty products.
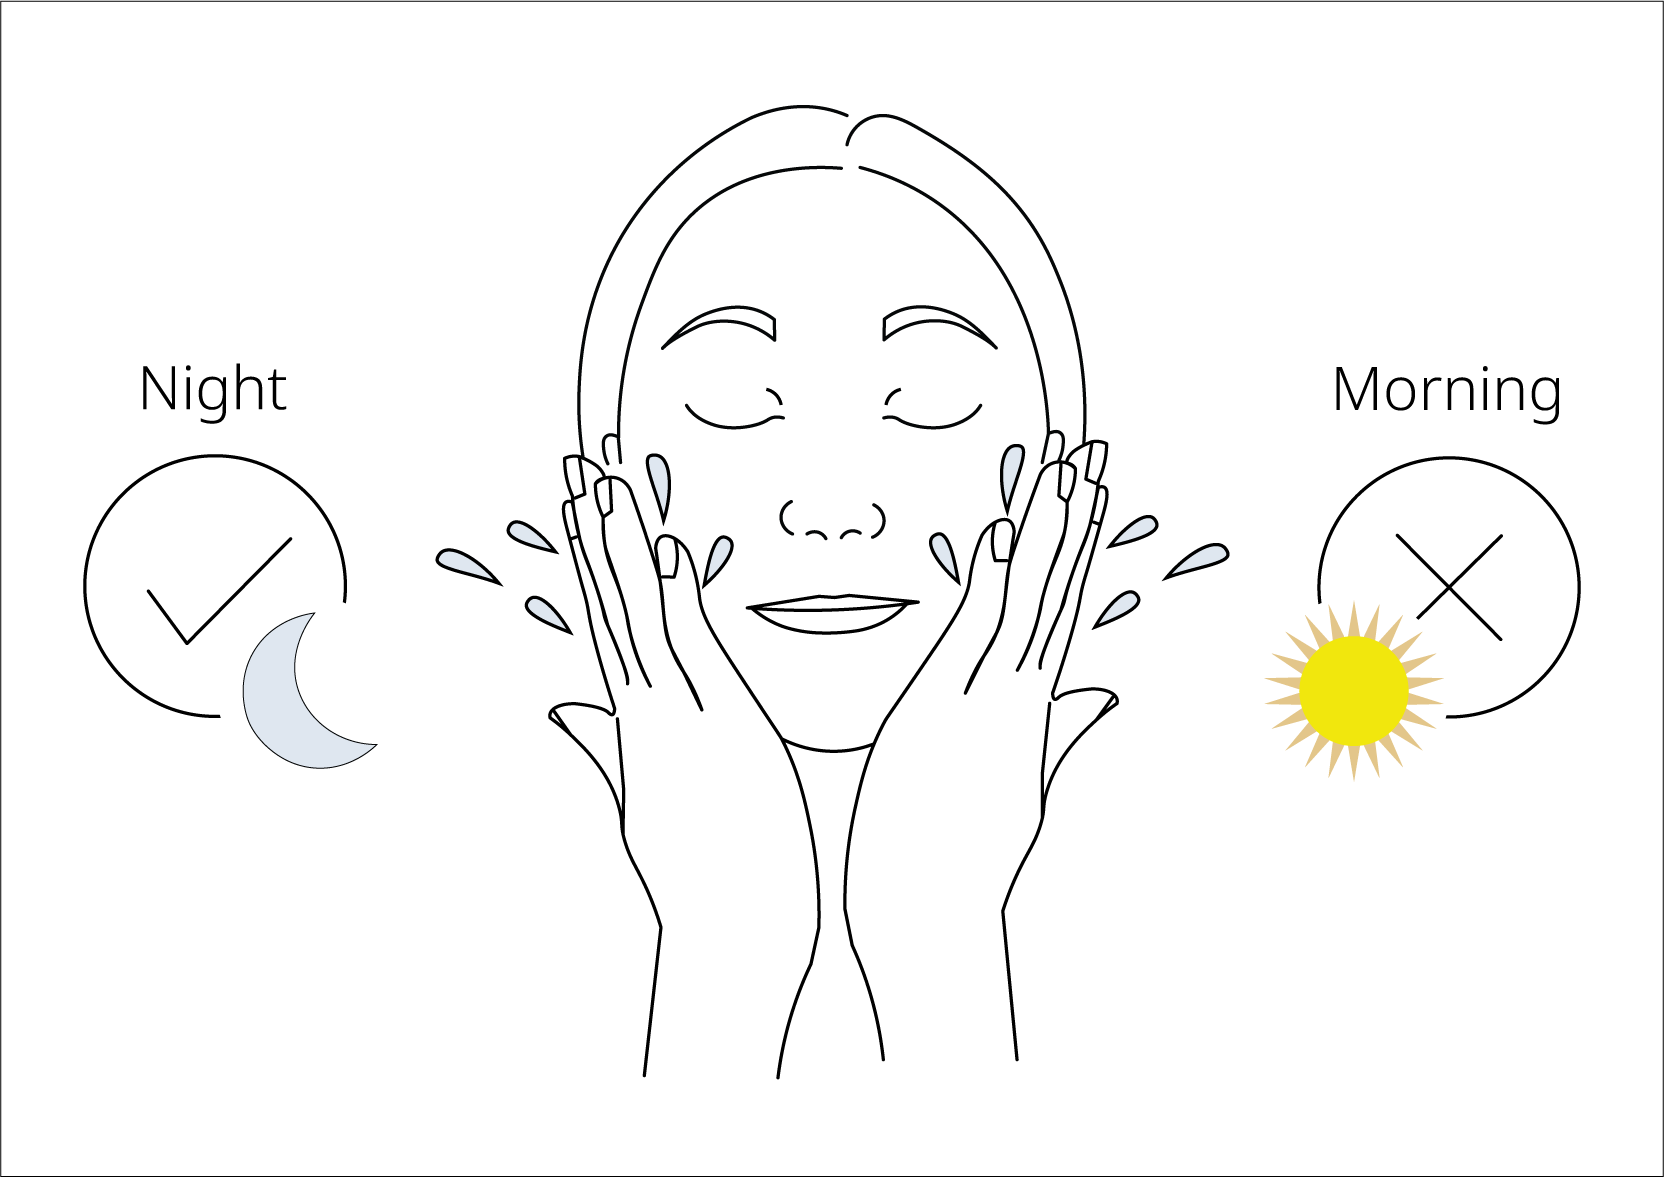
2. Morning of sampling
DO NOT: Wash your face or apply any skincare or beauty products before taking the sample. Sampling should occur when the skin is in a natural state.
Step 4 | Collect sample
Only use this collection kit if your face has been unwashed for at least 12 hours.
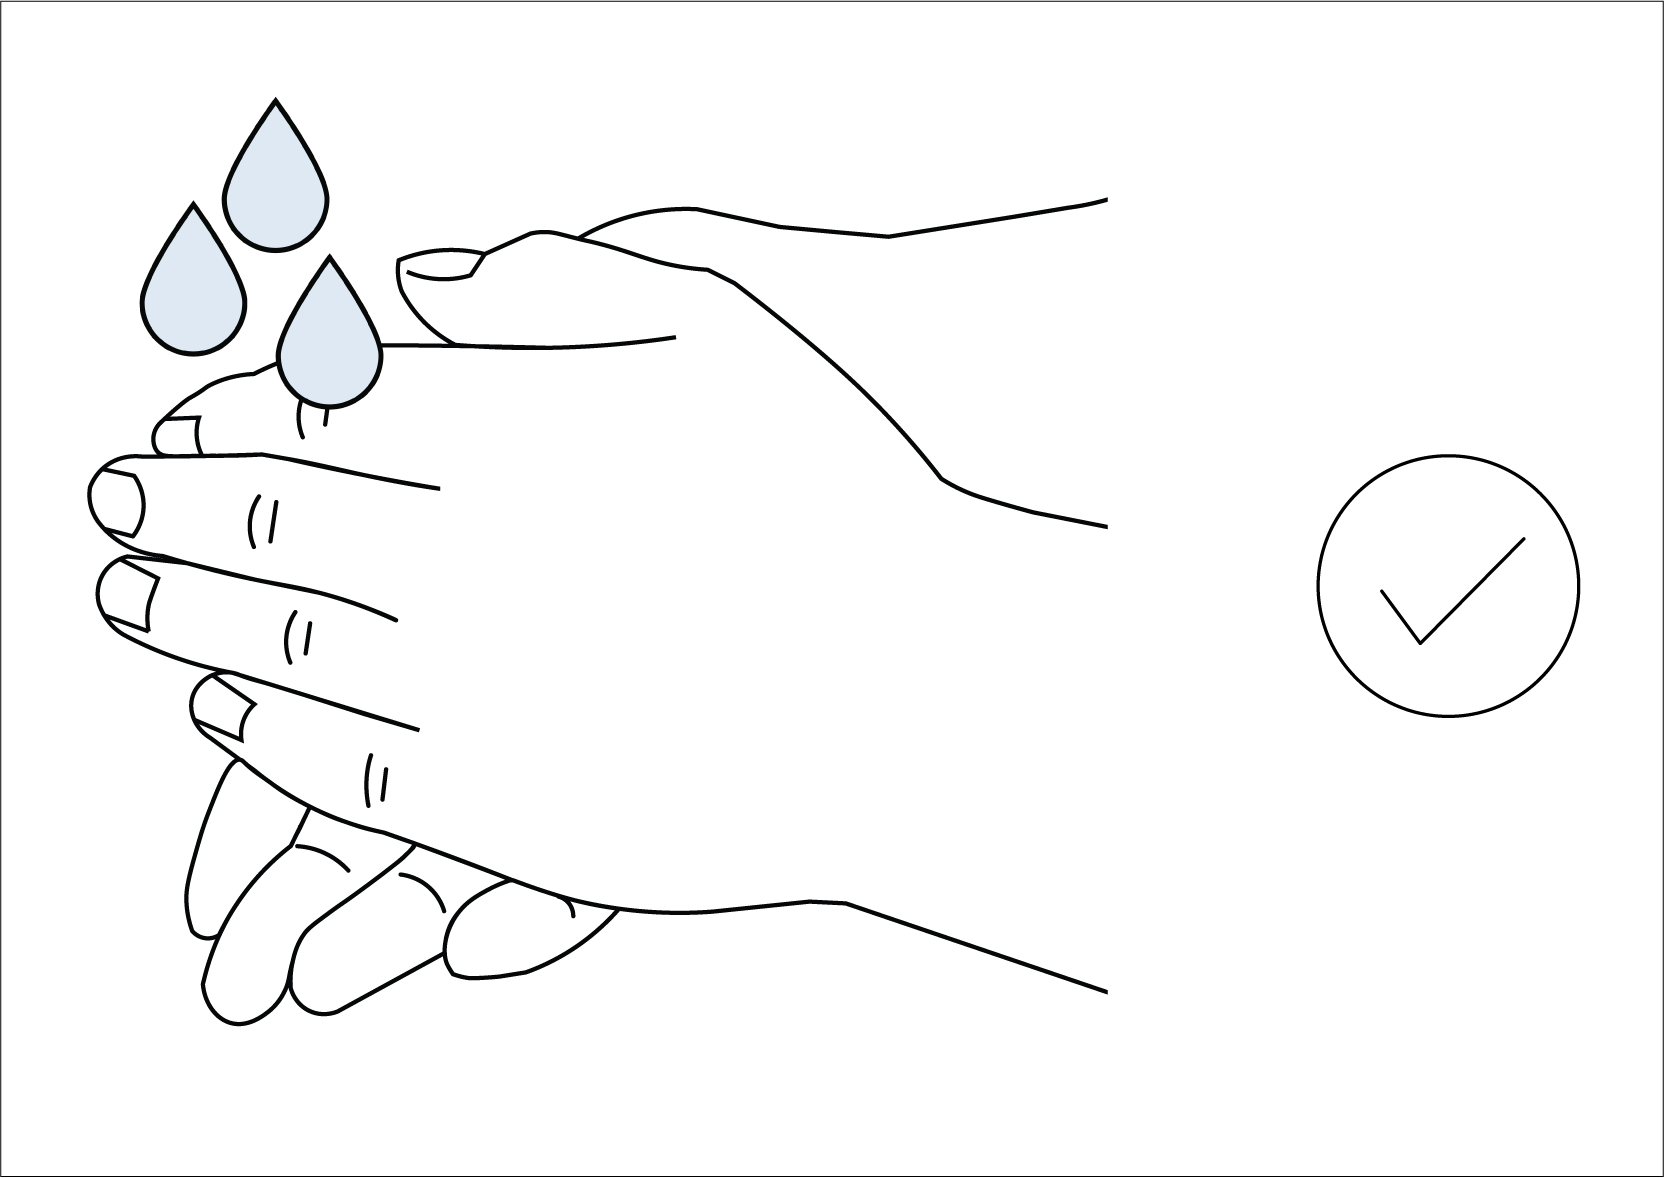
1. Wash hands with soap and water before collection.
2. Have information card on hand to record the collection information.
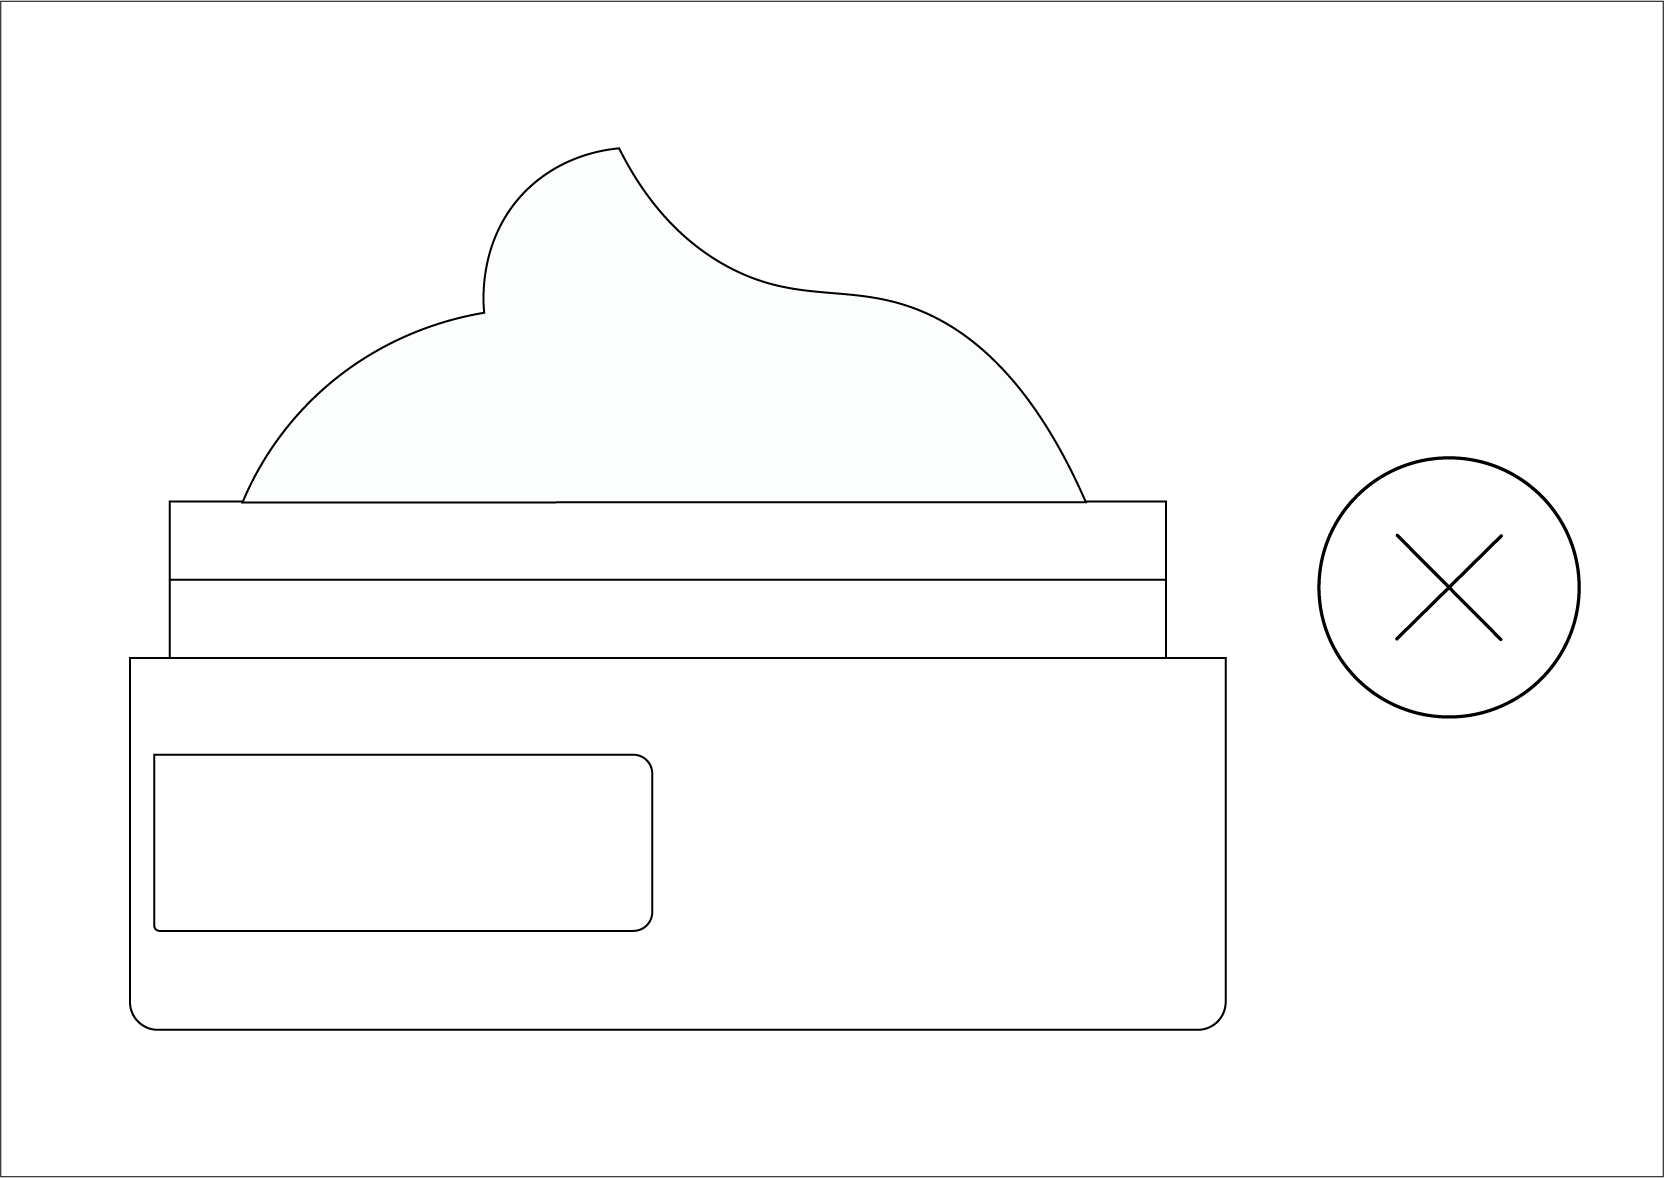
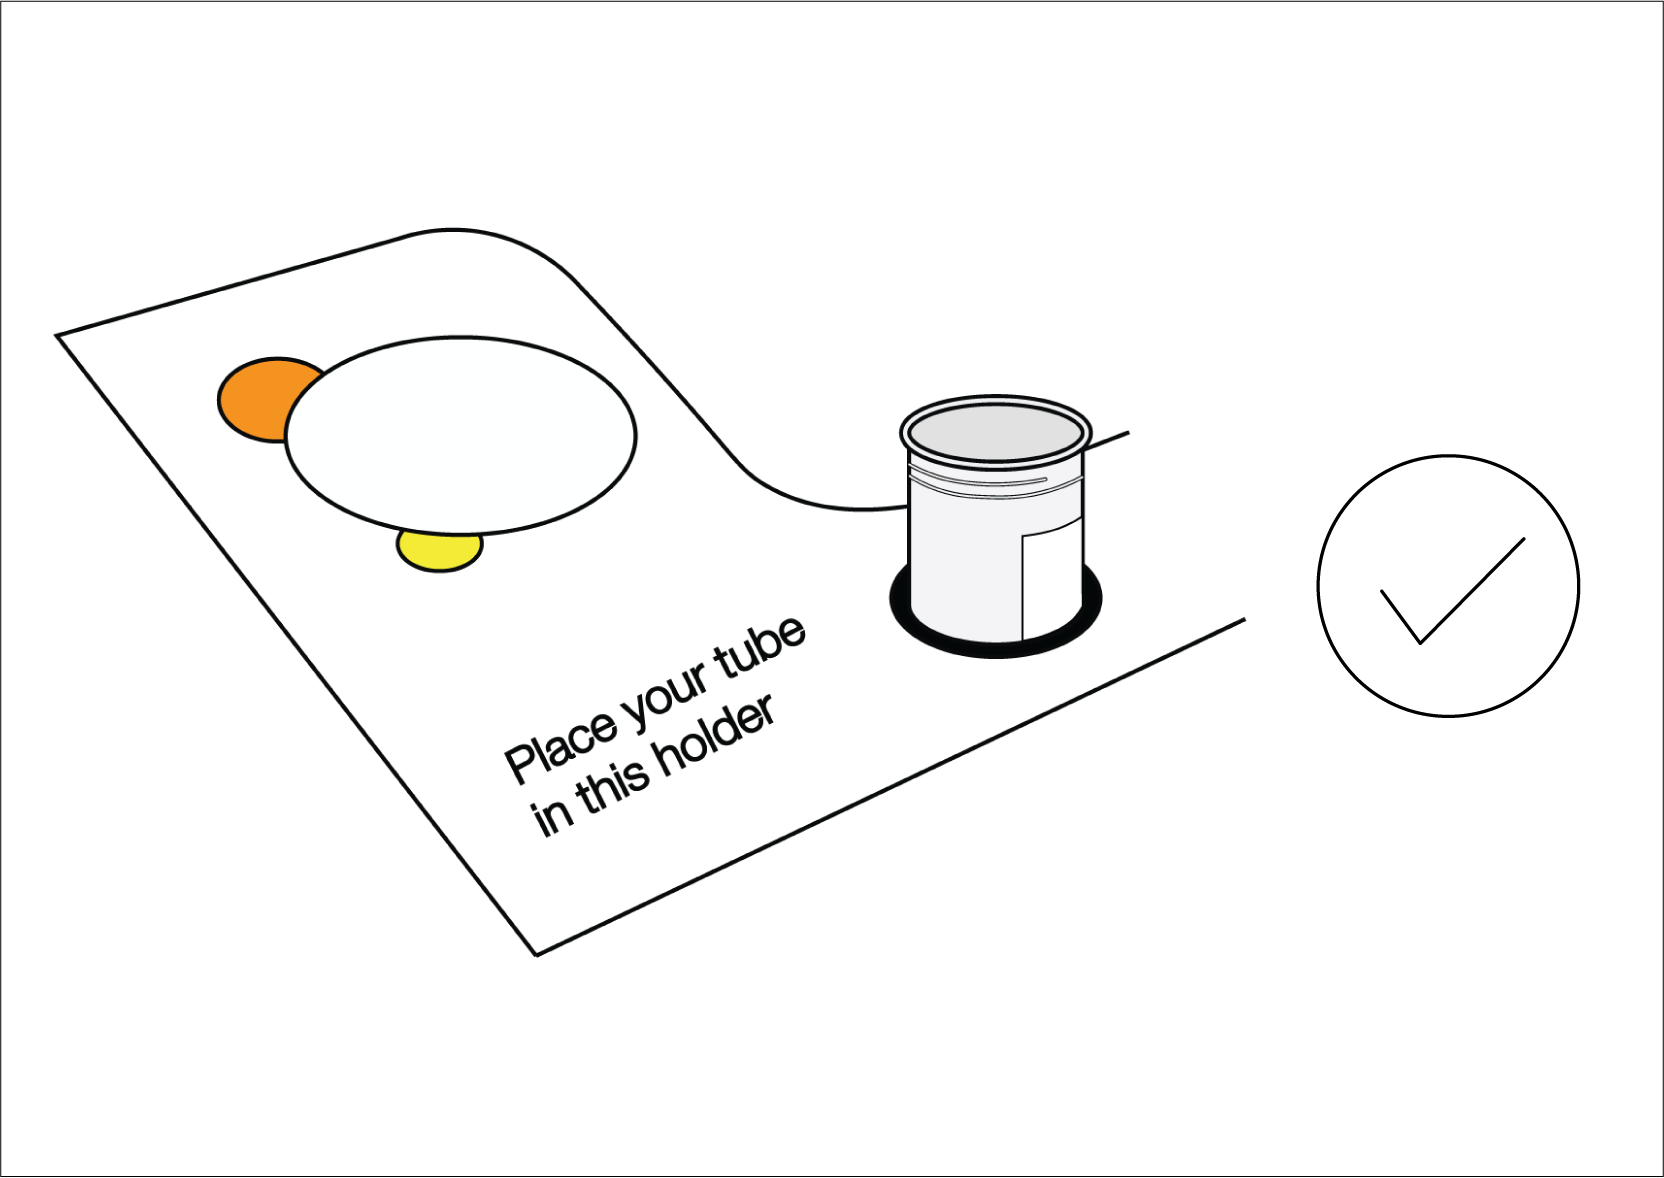
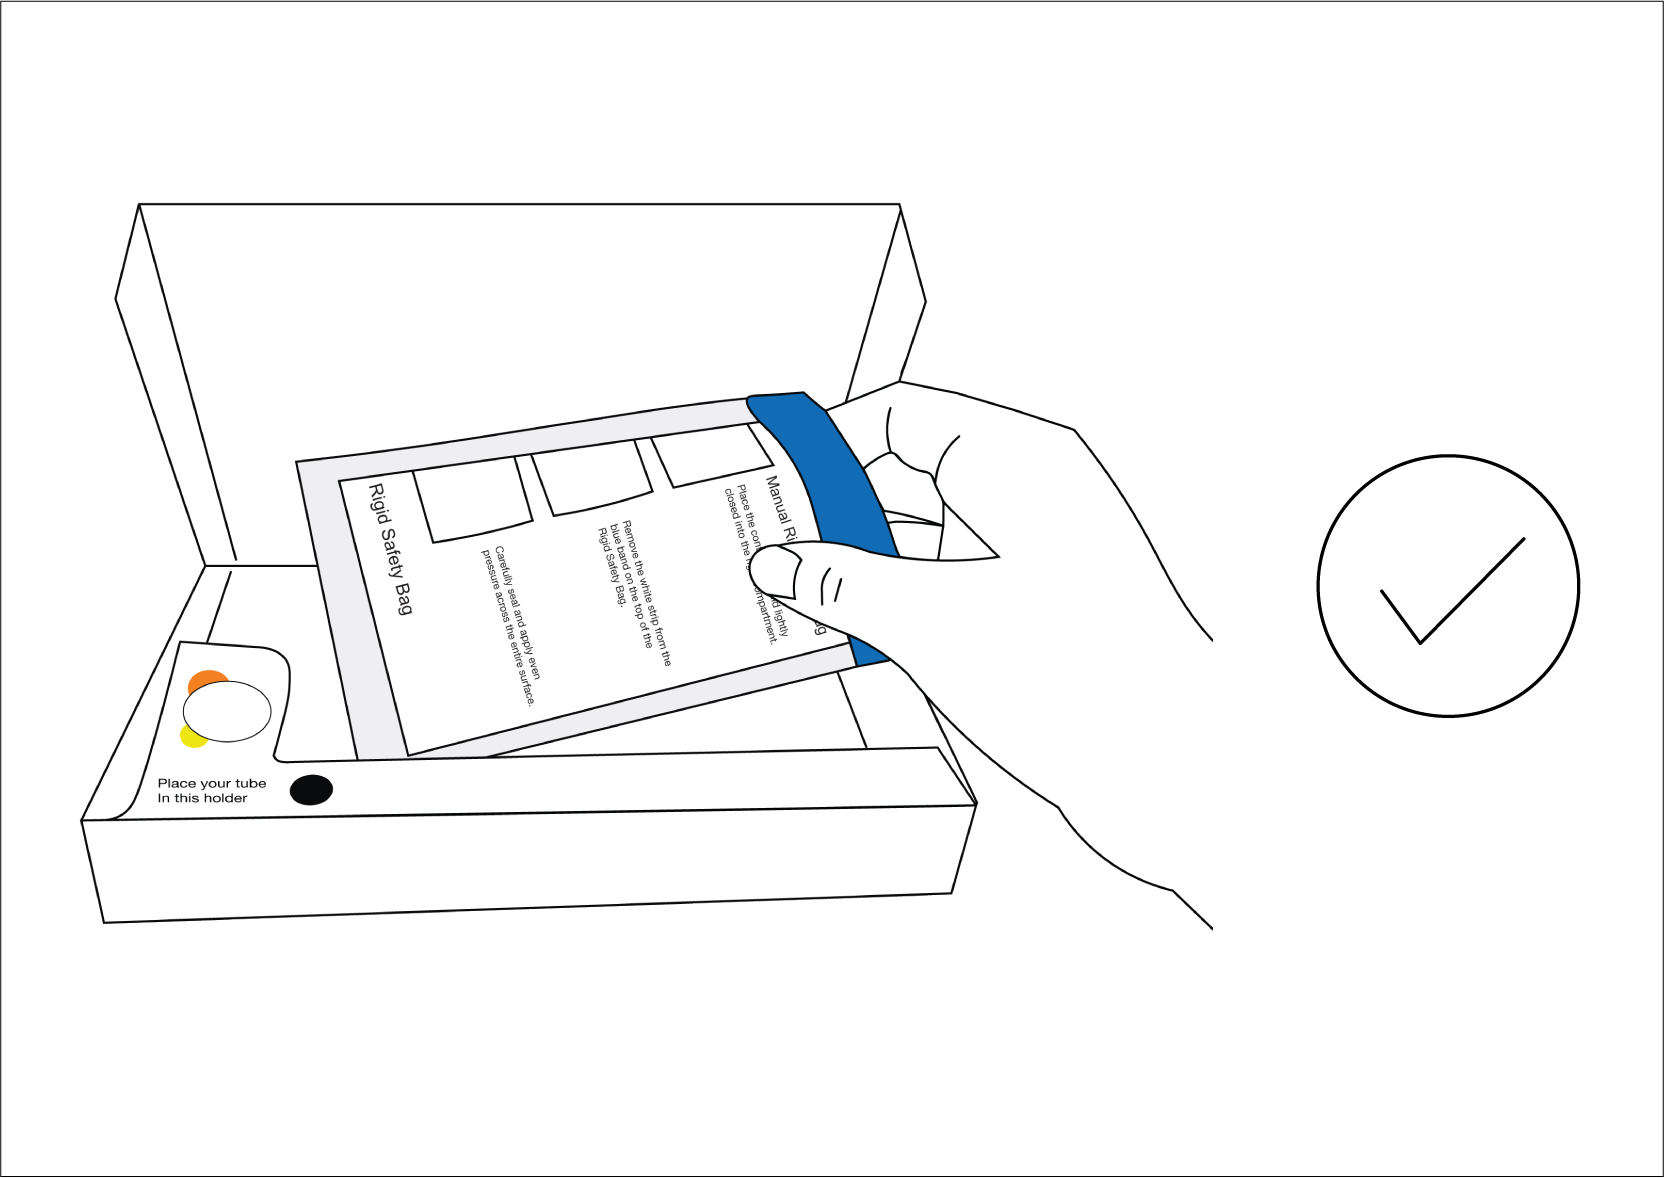
3. Set up collection kit shipping box on a convenient flat surface. Open the collection tube cap, being careful not to spill the liquid inside.
4. Place collection tube in the smallest built-in tube holder, to the right of ‘Place your tube in this holder’.
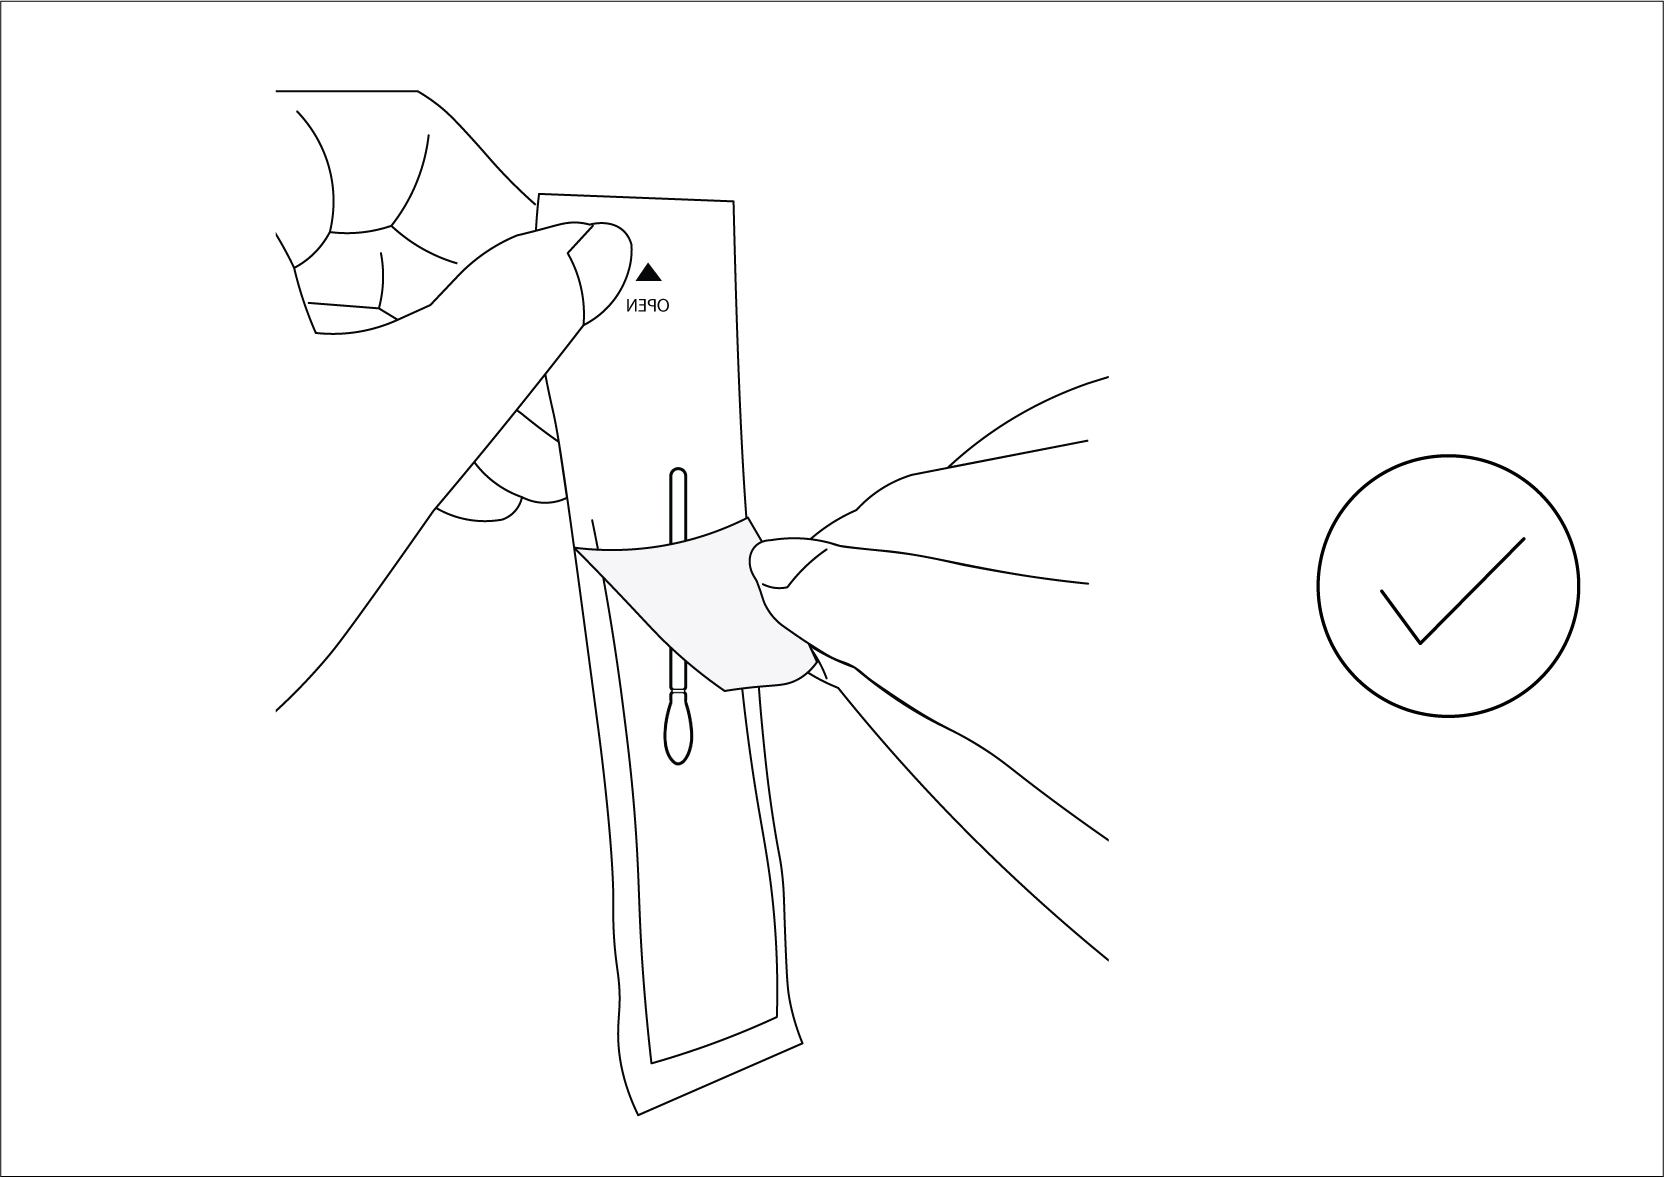
5. Have sampling swab prepared:
- Find the end marked ‘OPEN’. Partially peel back the outer cover only halfway.
- DO NOT take out the sampling swab until ready to use.
6. Put on disposable gloves and take out the swab template.
- Keep it off any surface to maintain sterility.
- Hold it in place against your cheek (either cheek), exposing skin through the template window.
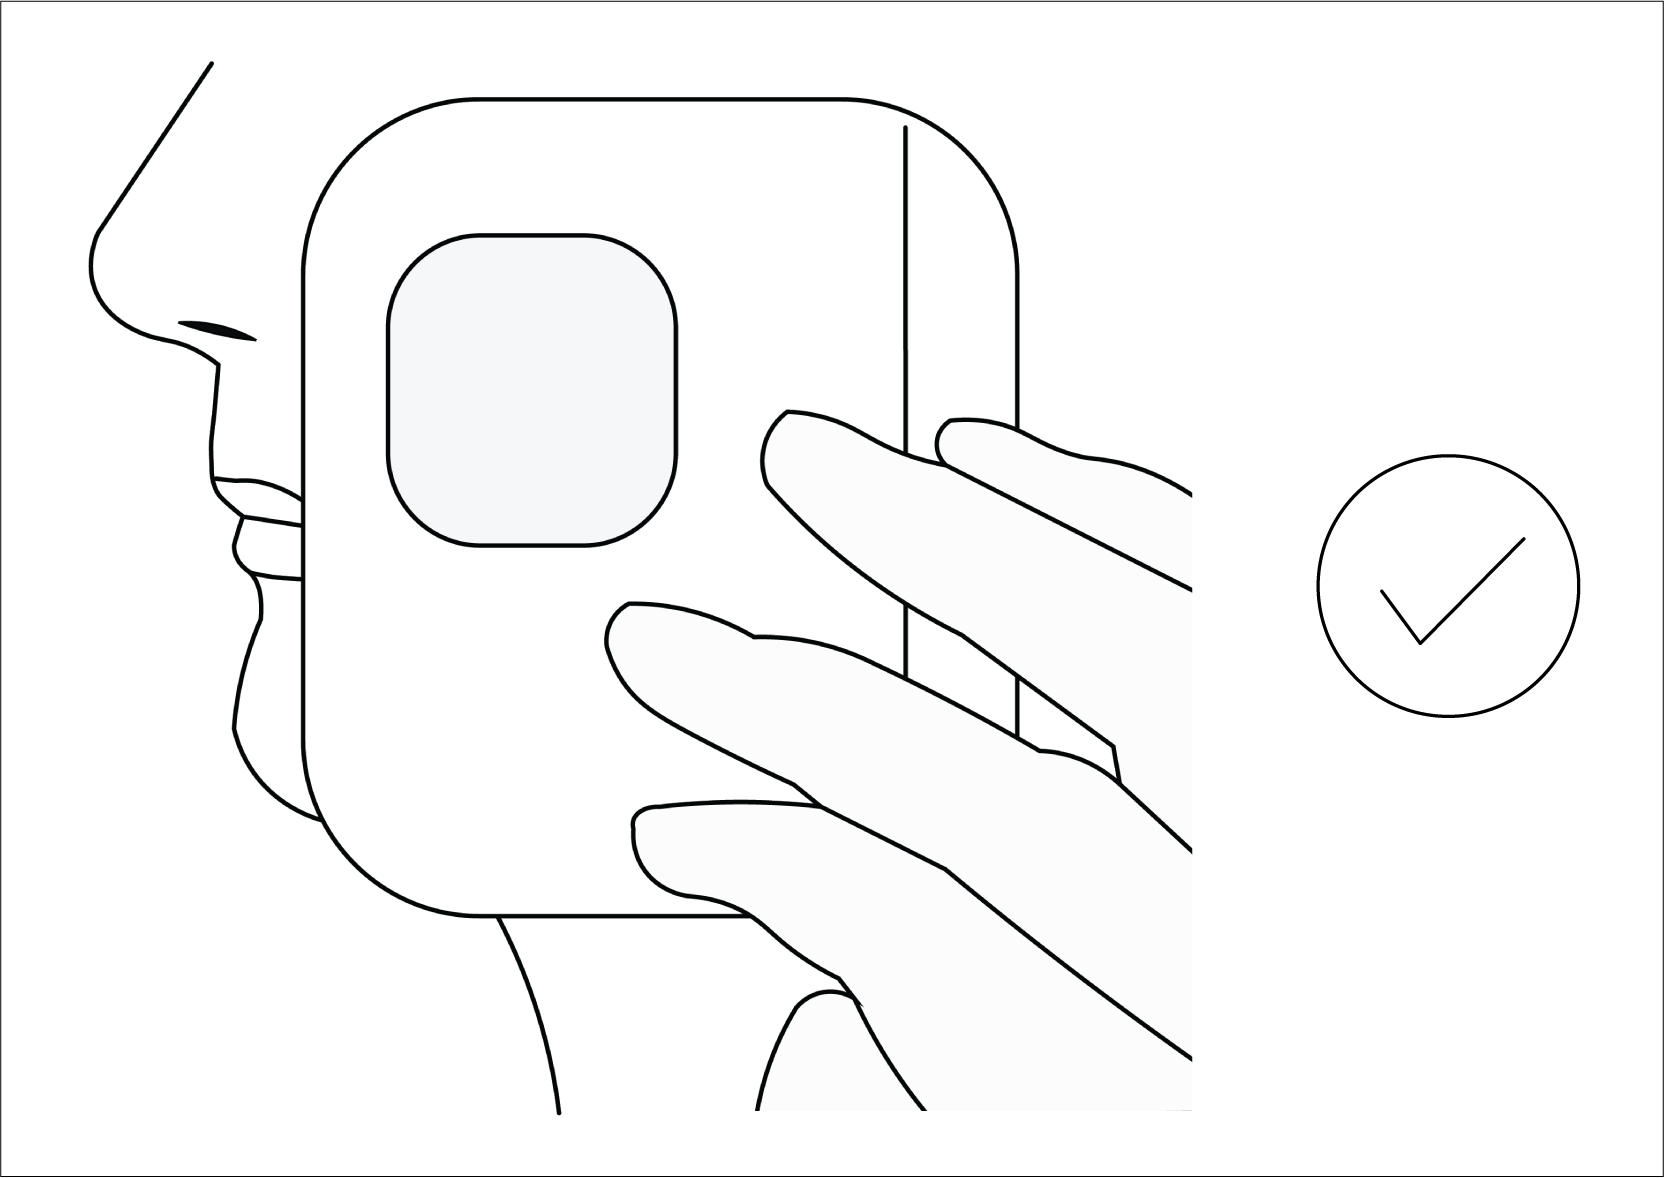
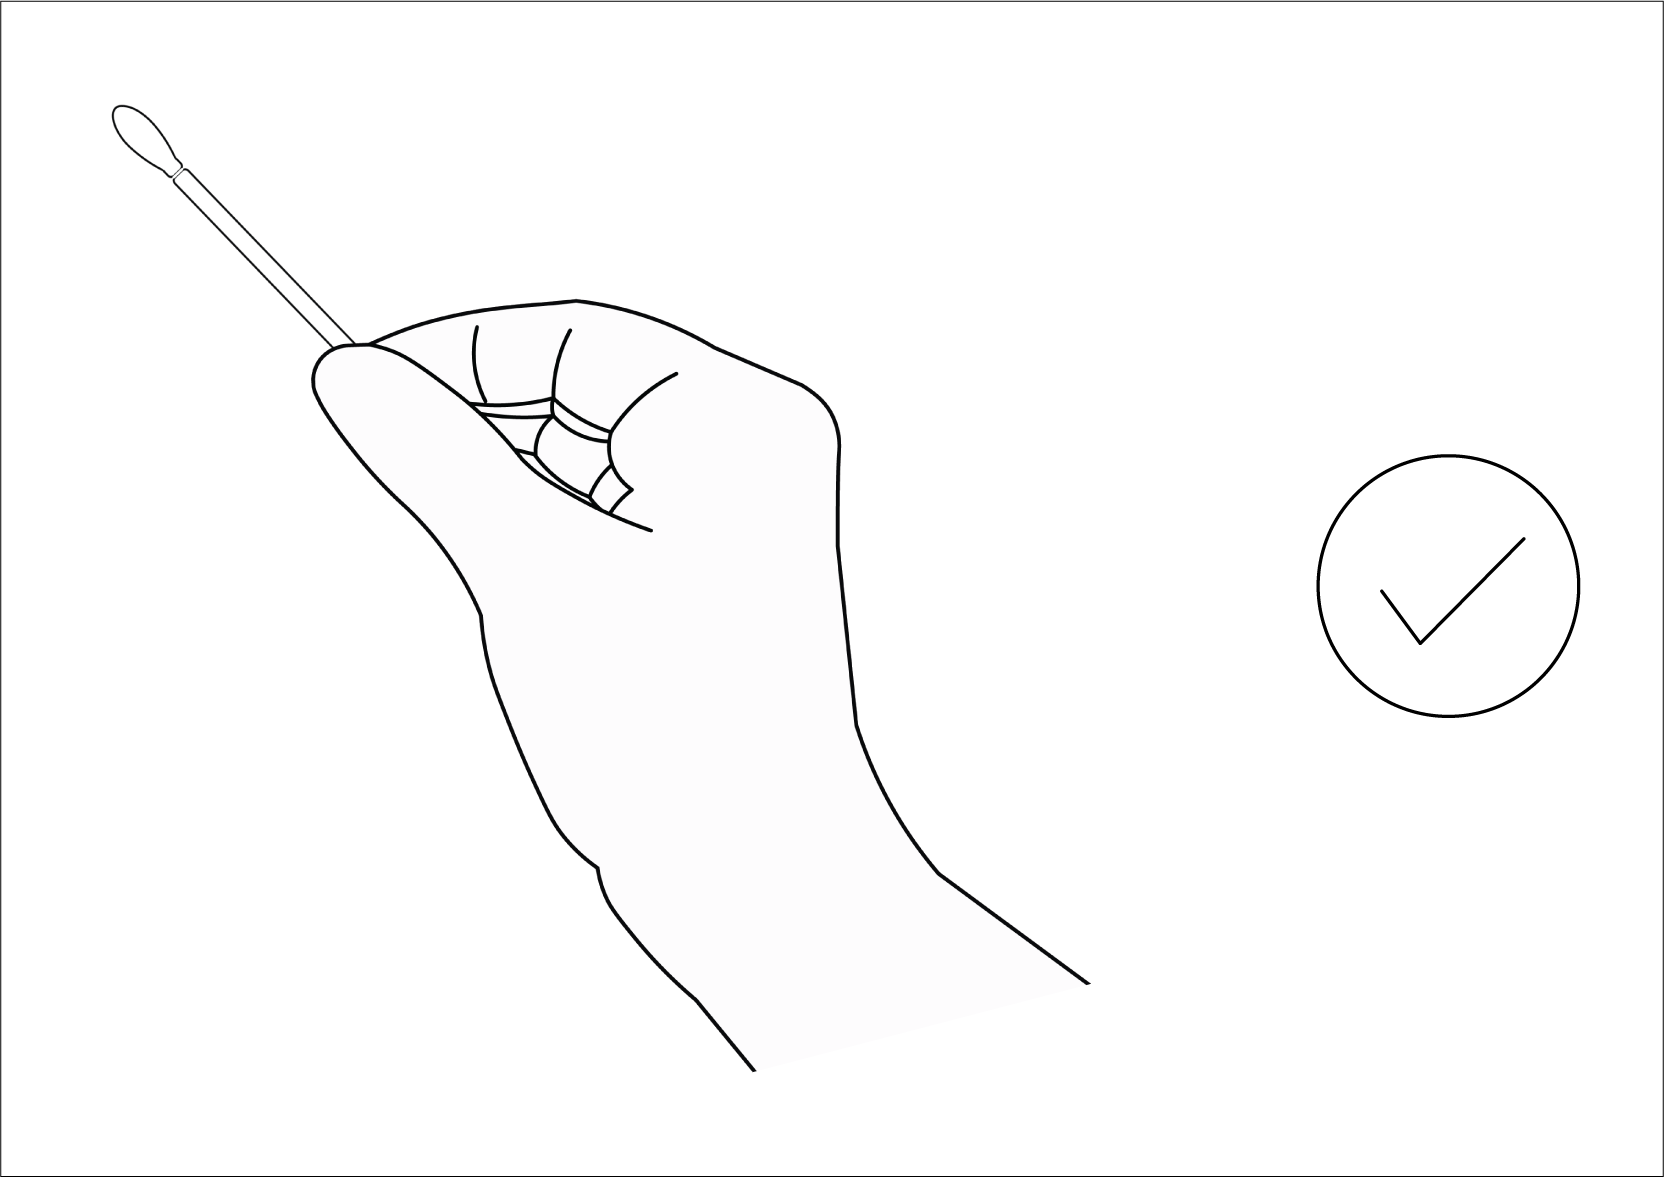
7. Using the other hand, take out the sampling swab. Make sure to handle the swab at the end of the shaft only. Avoid touching the cotton tip.
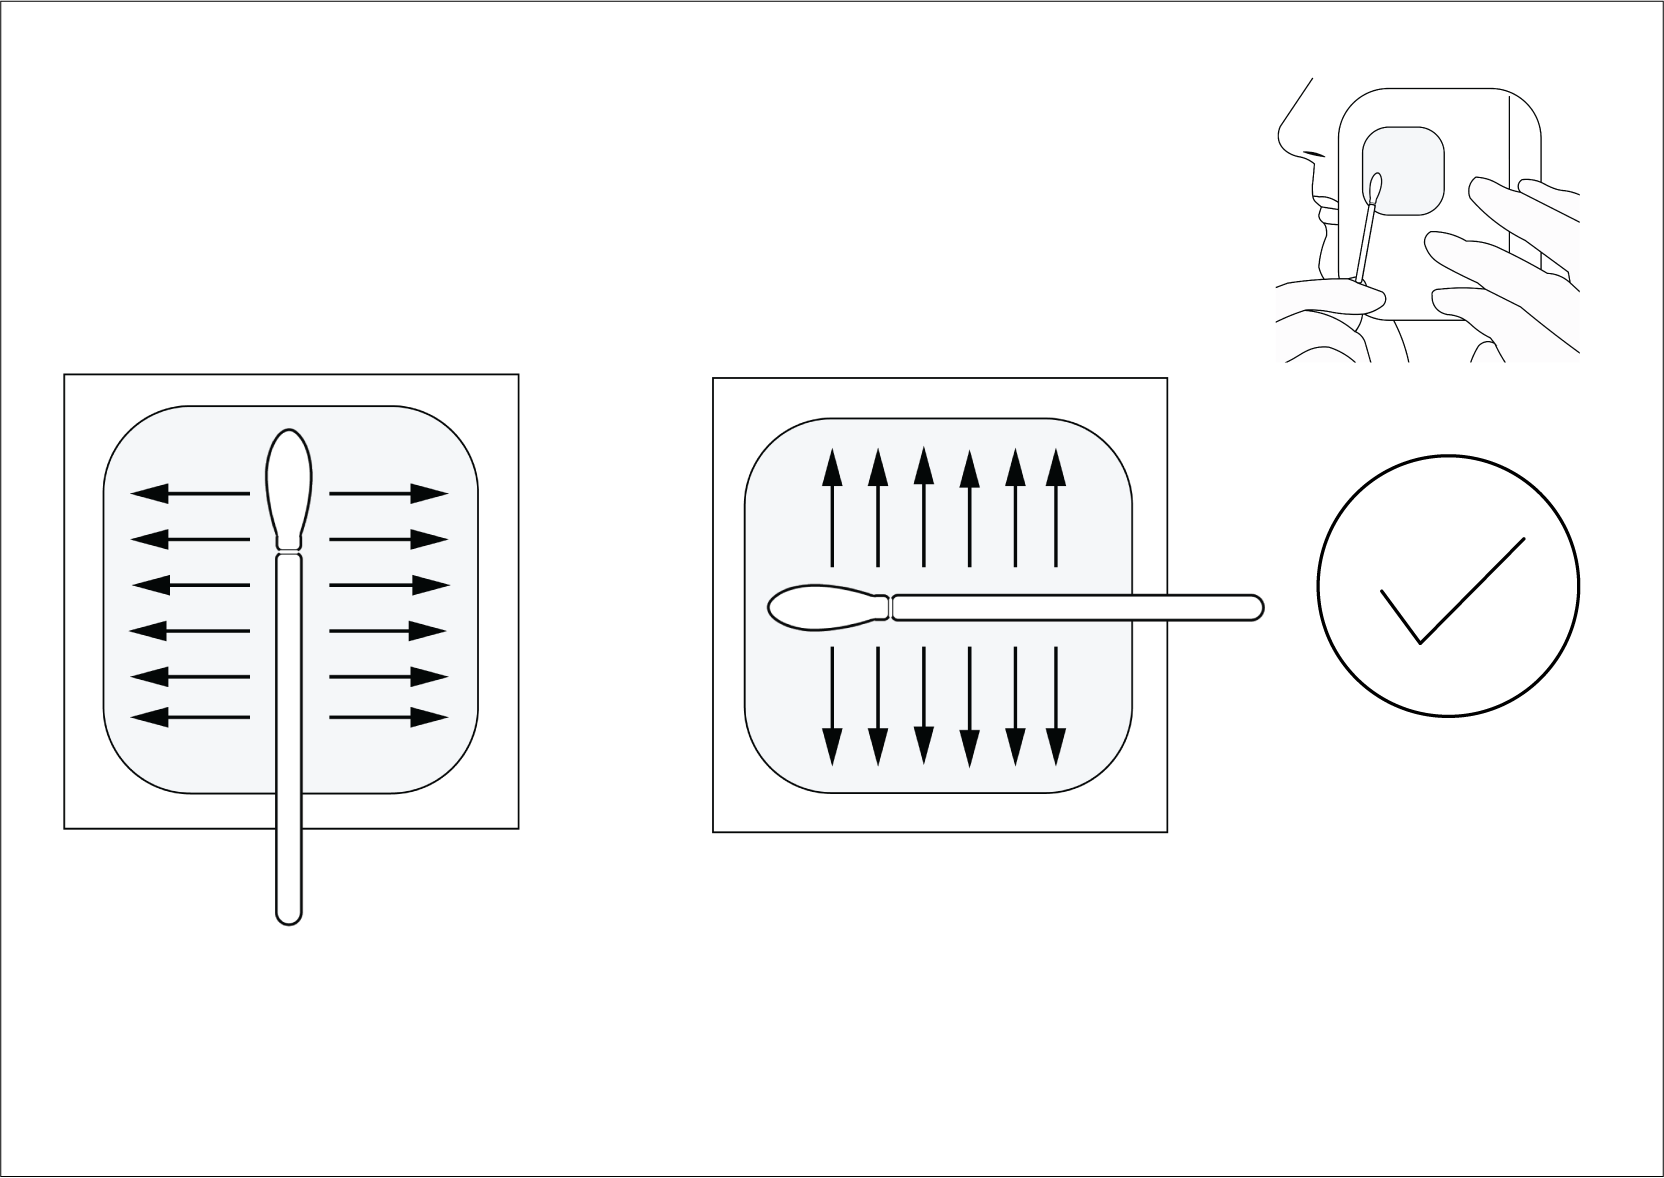
8. To swab:
- Move the swab horizontally across the full area for 20 seconds (Pattern 1).
- Move the swab vertically over the full area for 20 seconds (Pattern 2).
- Ensure firm pressure throughout, and use all sides of the swab tip.
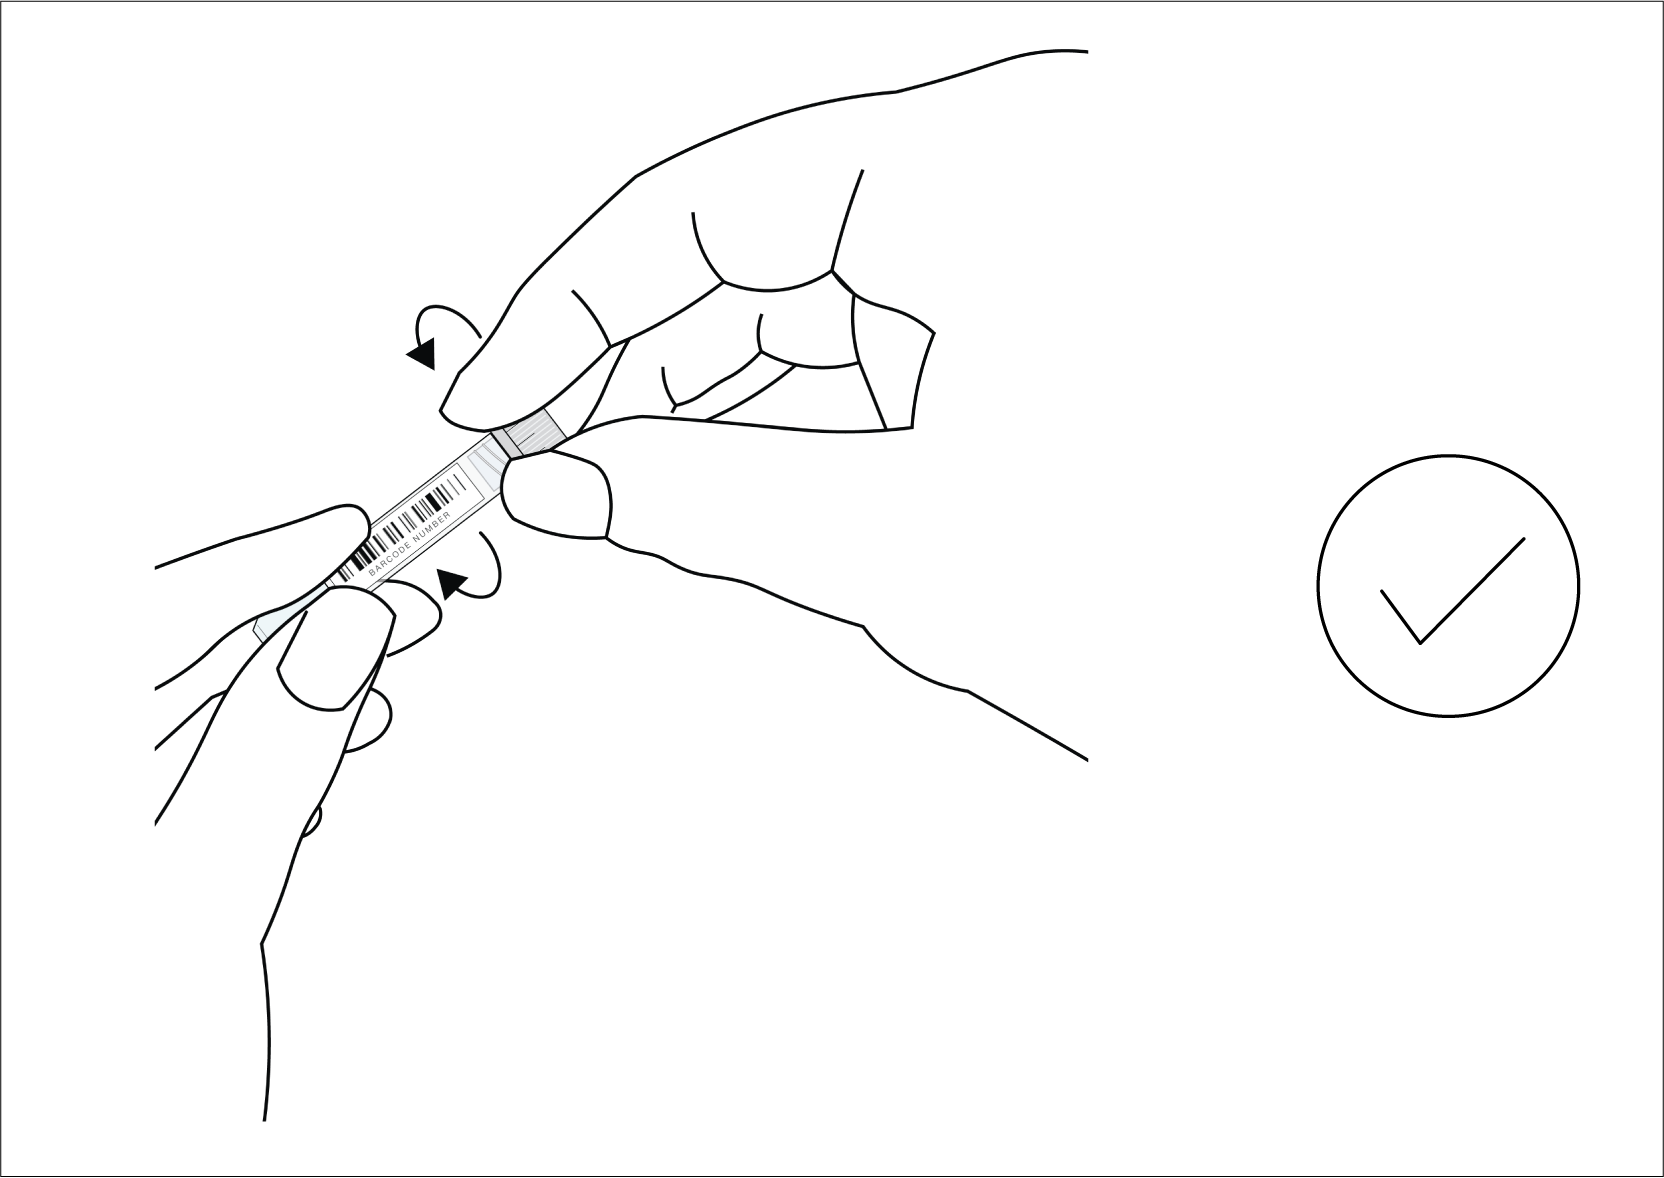
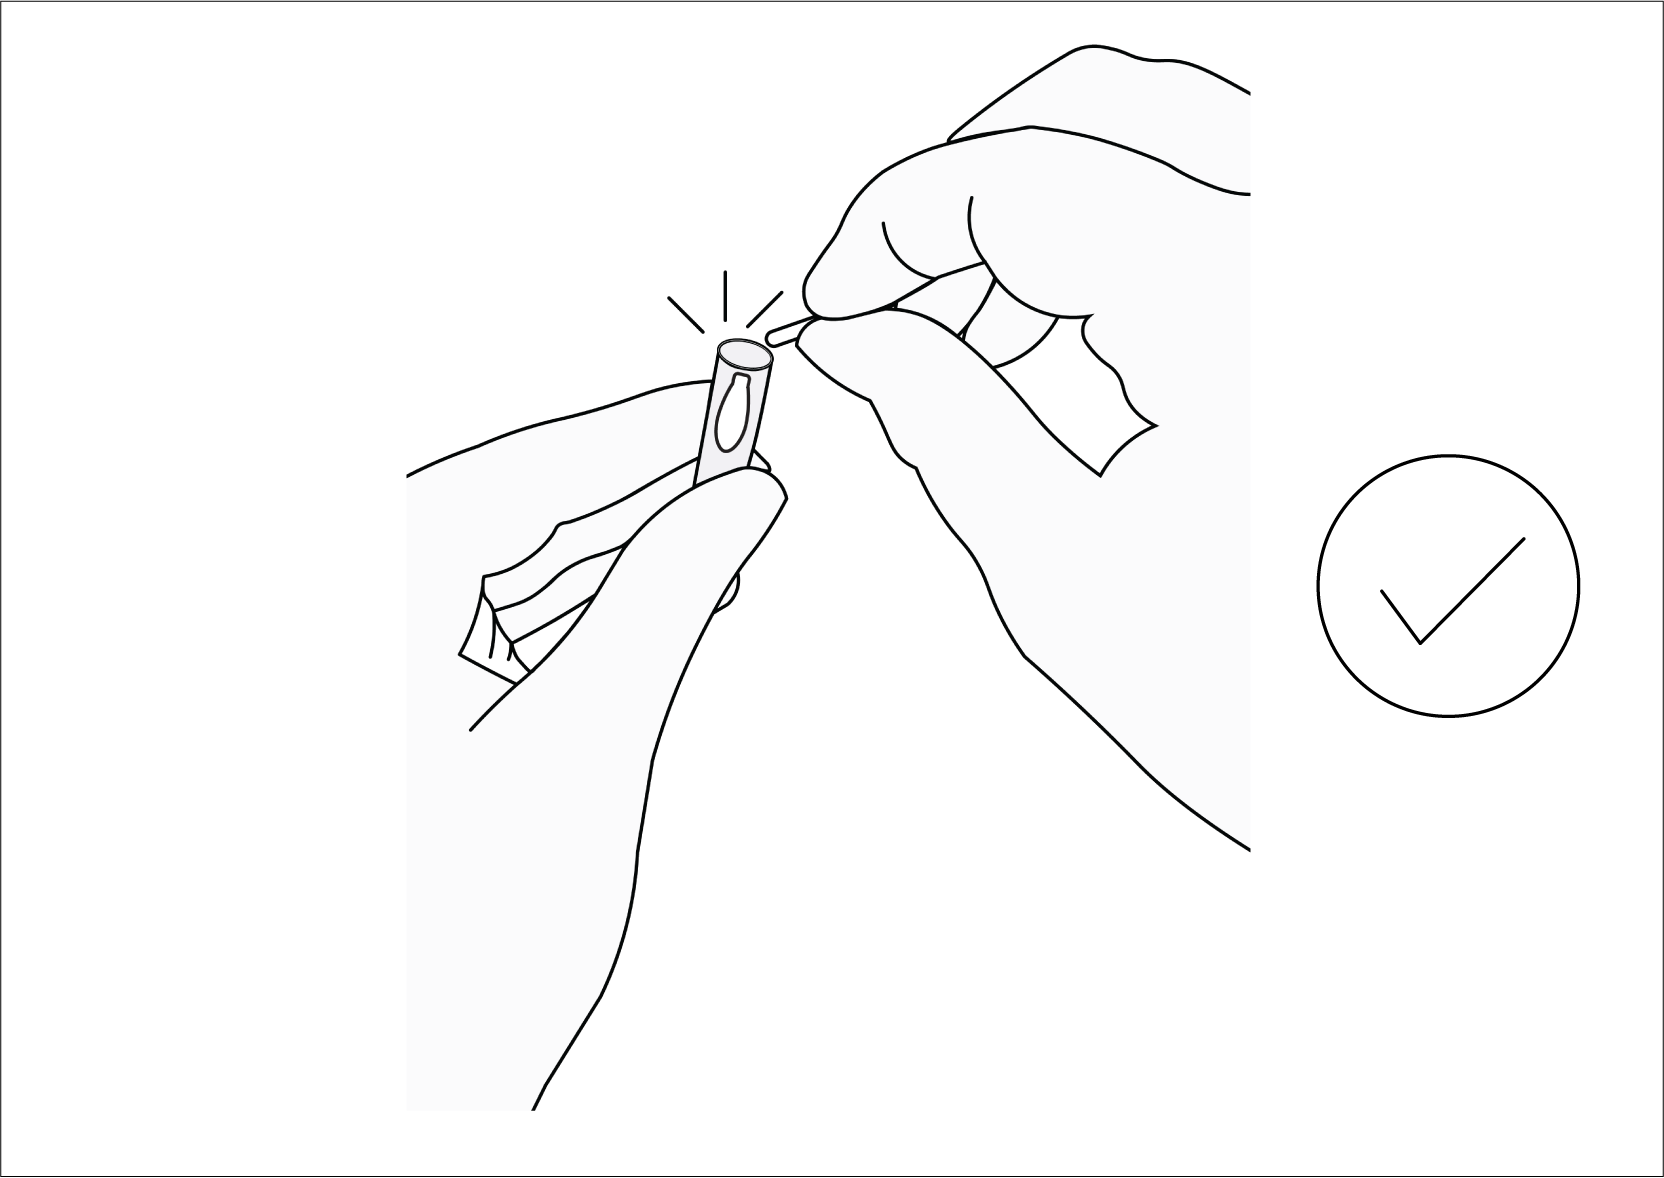
9. Place sampling swab, cotton tip pointing down, into the collection tube with the preservation solution. Carefully take the collection tube out of the holder.
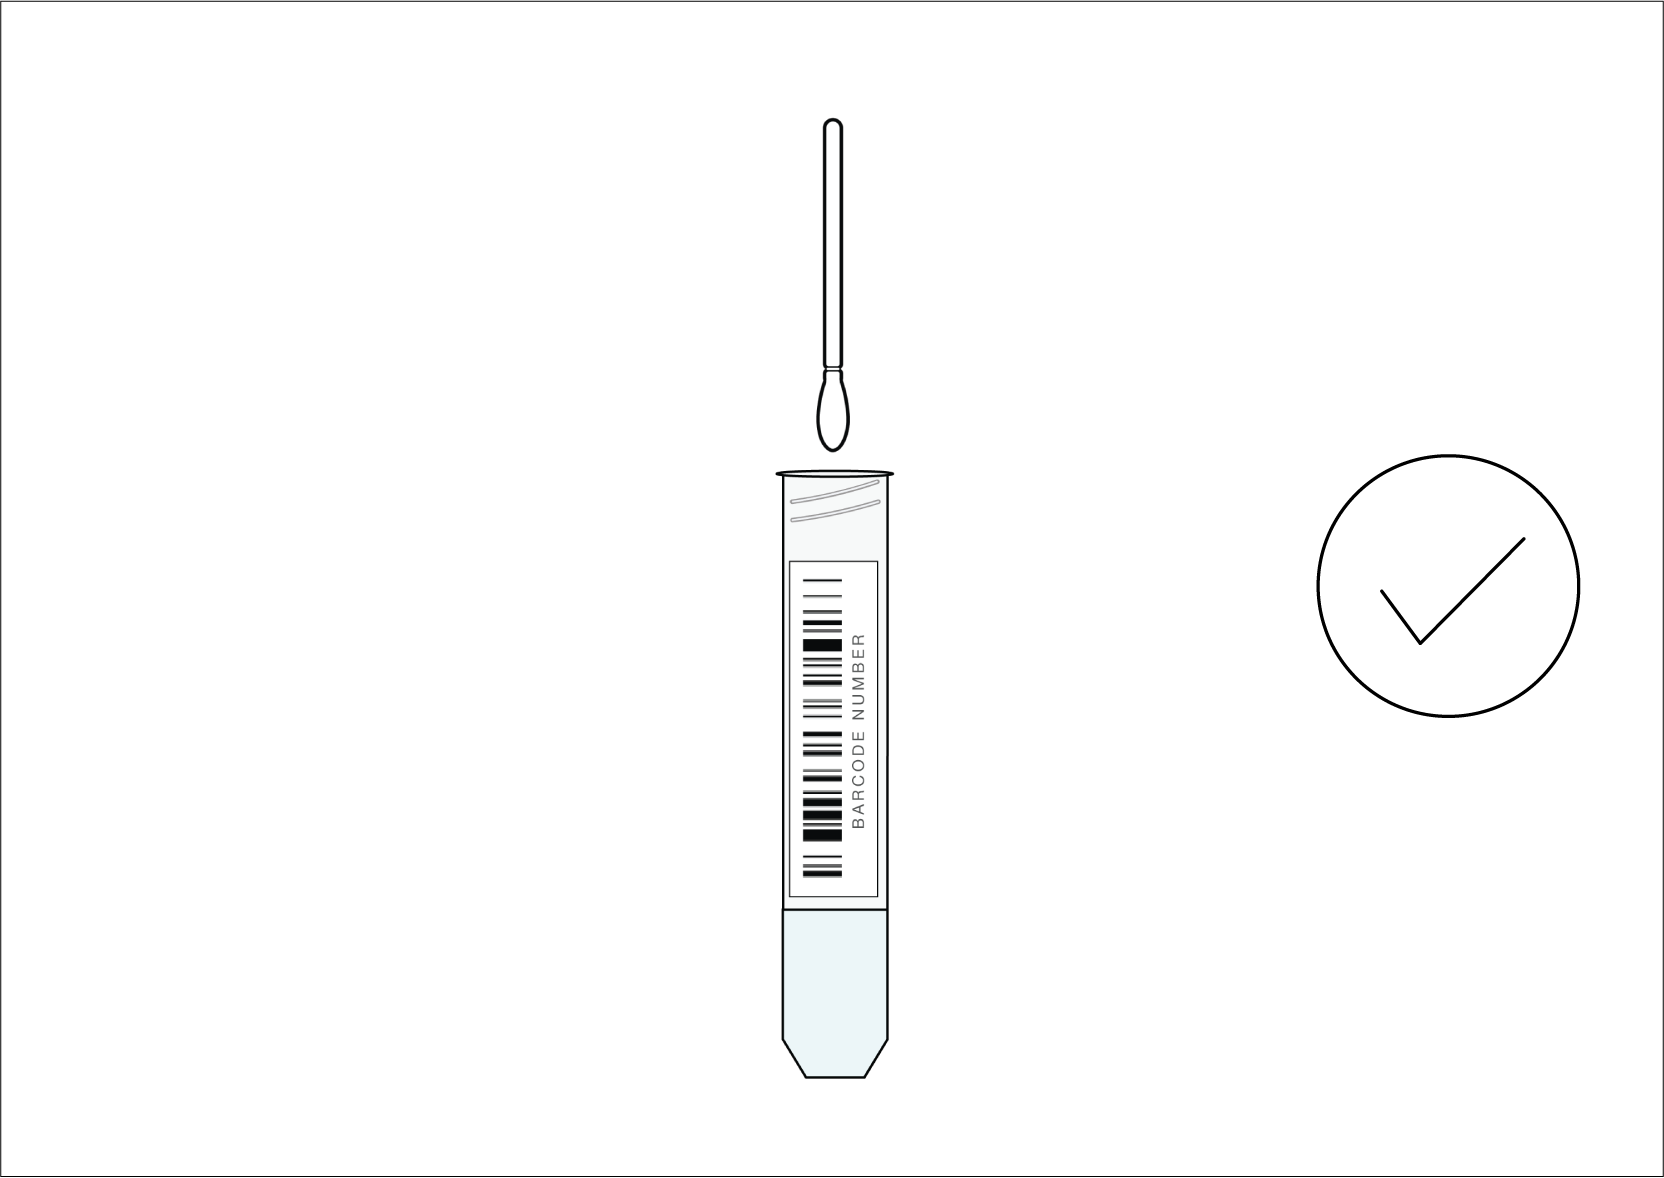
10. At the notched break-off point (just above the swab tip), snap the plastic shaft against the inside of the collection tube, leaving only the cotton tip inside.
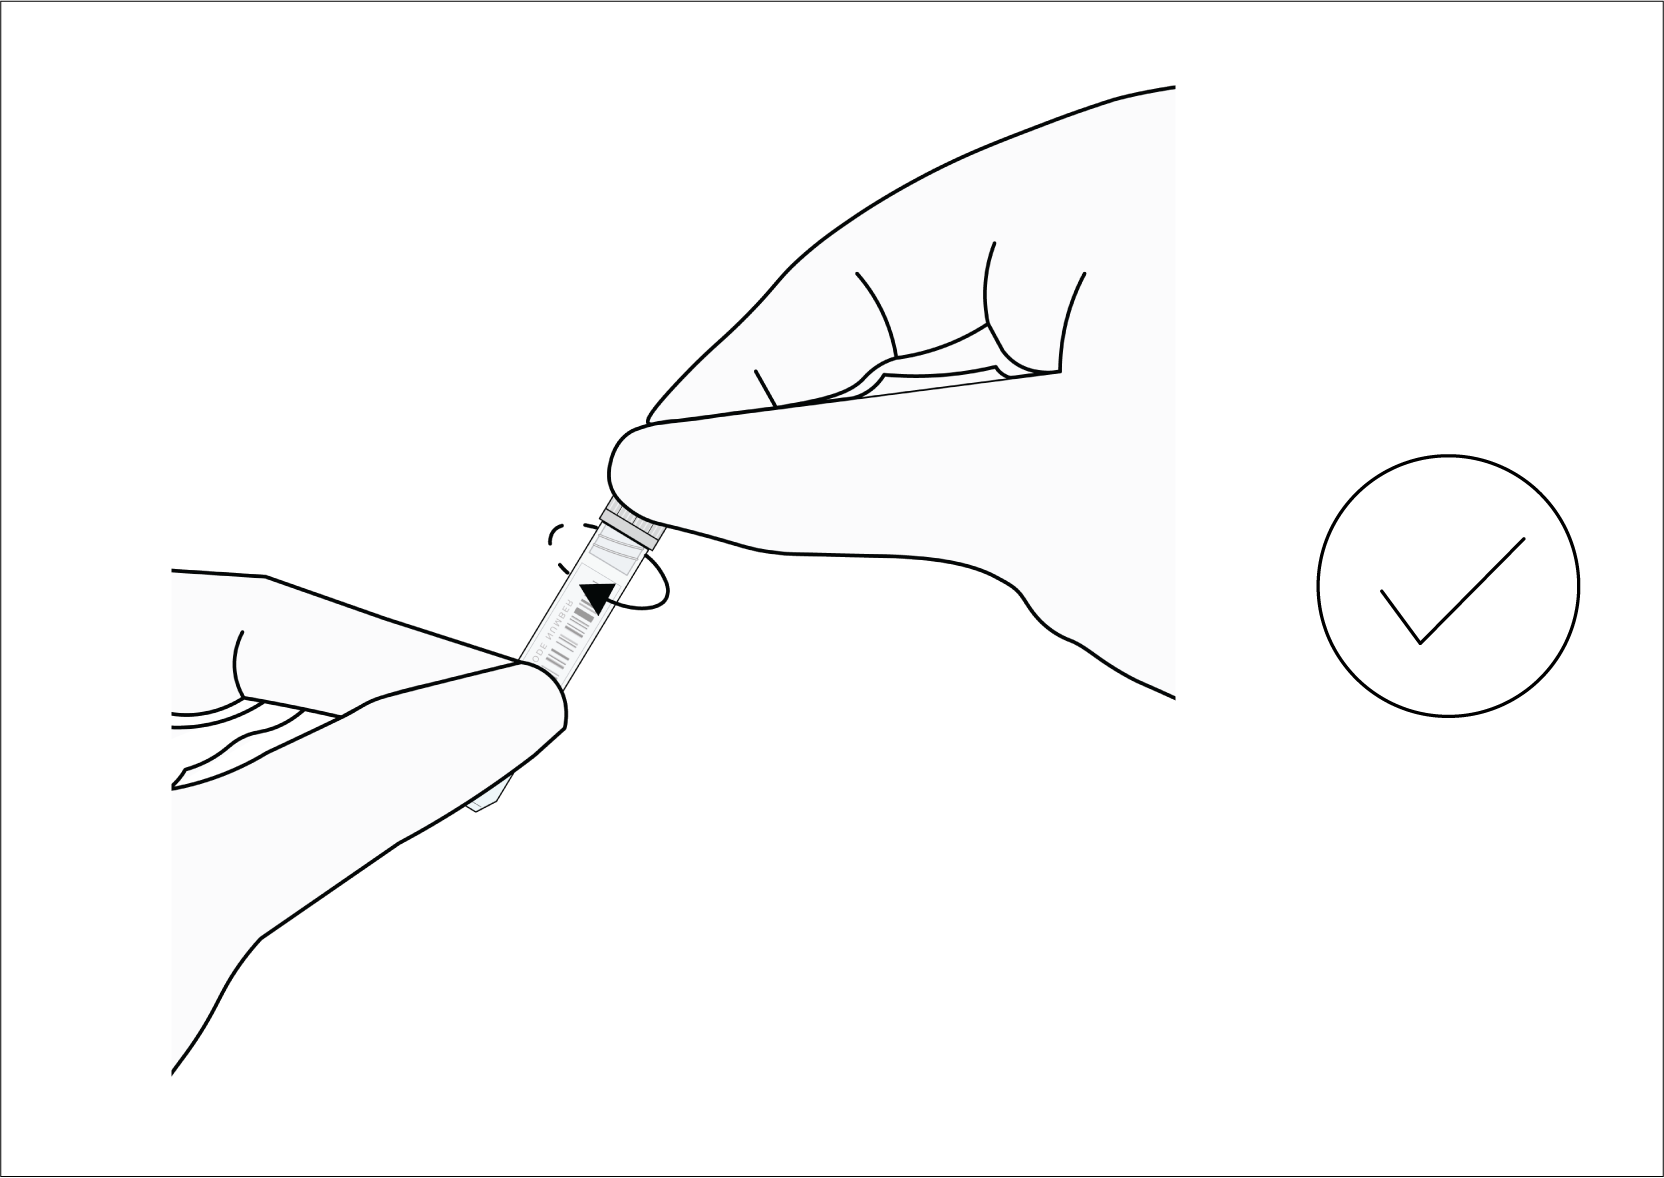
11. Tighten the cap onto the collection tube, making sure no contents can leak out. Ensure that the cotton tip is fully submerged in the preservation liquid by gently tapping the collection tube.
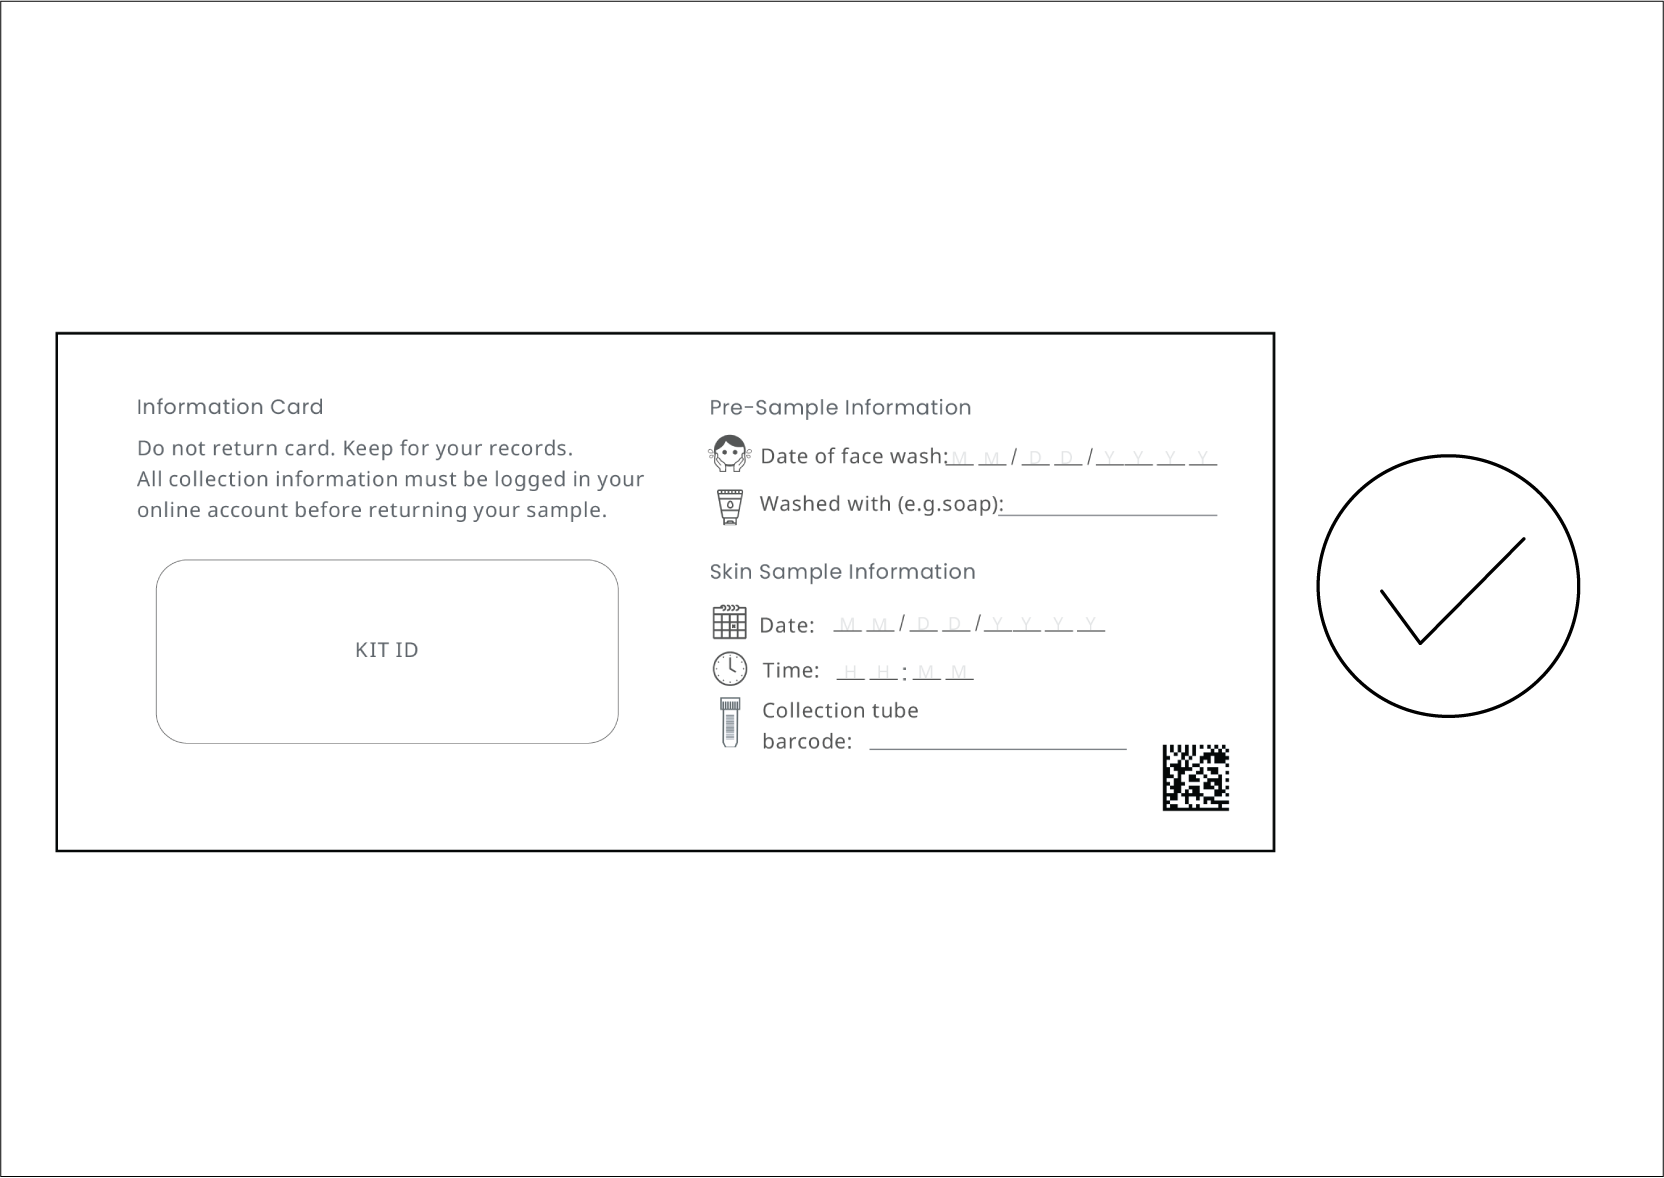
12. Remove and dispose of gloves and record your collection details.
On the information card, add the following:
- Date of last face wash (night before sampling).
- Product(s) used during last face wash (e.g. soap).
- Barcode ID (found on the collection tube).
- Collection date.
- Collection time
Step 5 | Log sample
We can only process your sample if you’ve entered the sample information online. Only return your sample after completing this step.
- Log in to your account at microsetta-rest.ucsd.edu
- On the ‘My Kits’ page, select the matching barcode ID.
- Add the sample collection information that you have recorded on your information card.
- Keep the information card for your records.
Step 6 | Return sample
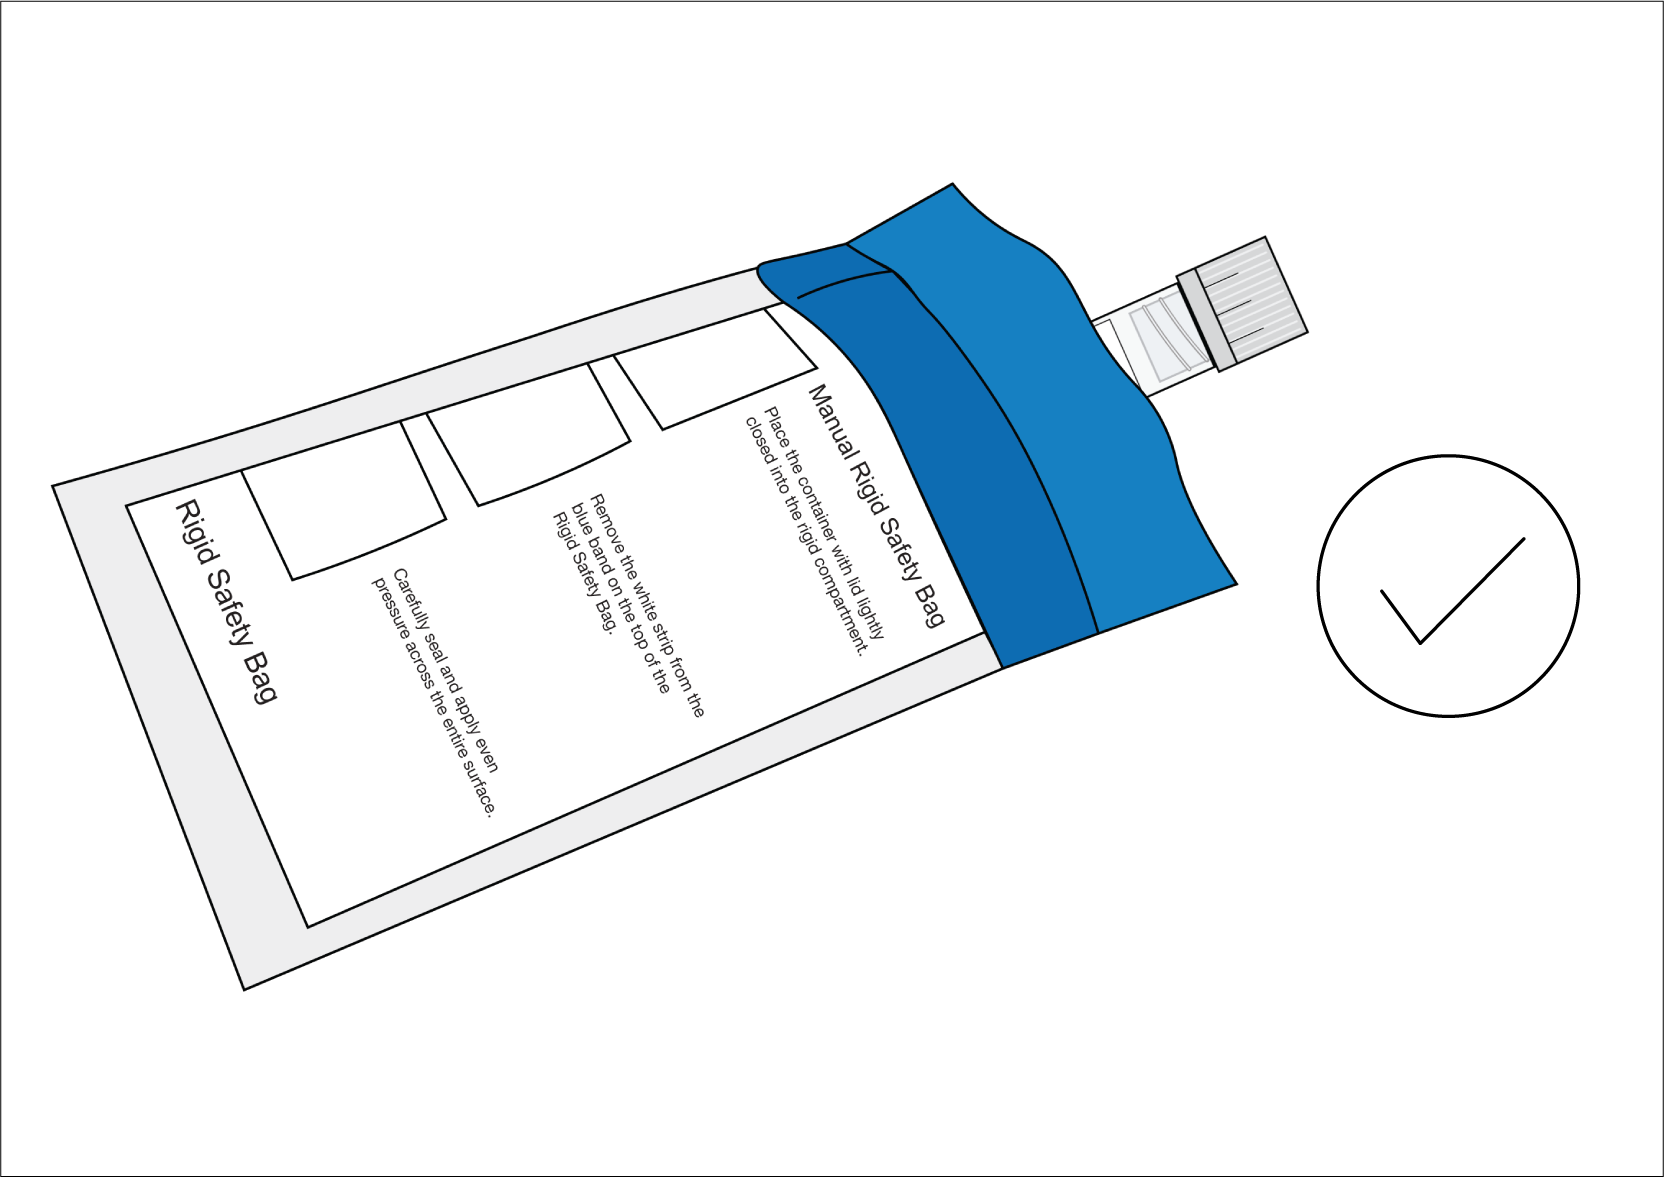
1. Check that the collection tube is tightly closed and does not leak. Place the collection tube into the safety bag provided and seal it.
2. Place the safety bag into the cardboard shipping box you received (do not use the outer sleeve) and close it.
3. We recommend sealing the box tightly with tape before shipping.
Shipping instructions
- Ship the sample back to the lab as quickly as possible, ideally within 48 hours of collection (but can be up to 2 weeks later). The sample can be stored at room temperature until it can be shipped back; refrigeration is not necessary.
- The shipping box has a pre-affixed and prepaid shipping label attached. Do not cover or modify the shipping label or any other regulatory markings.
To ship:
- Schedule a FedEx Pickup by calling 1-800-463-3339 or drop off the shipping box at the nearest FedEx center. To find the closest FedEx Shipping Center, go to www.fedex.com/locate